Emails are the primary way to send notifications and messages from the platform to all types of people. This article will mainly go through sending an email from the people browse, but you can skip ahead to learn how to send emails from your project dashboard.
This article will go through:
To send out an email from the people browse, you need to first select who you are sending it to. You can either select people individually, manually select a number of people or select groups of people to email.
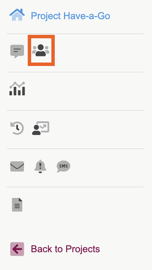
NOTE: This article will assume you are currently in the people browse. If you are not currently in the people browse you can navigate your way there by selecting the 'people' icon on the left hand side menu.
To select people individually follow these steps:
1. In the people browse you can find the person you’d like to email, and click the lightning bolt that appears when you hover over their name, this will bring up the action menu.
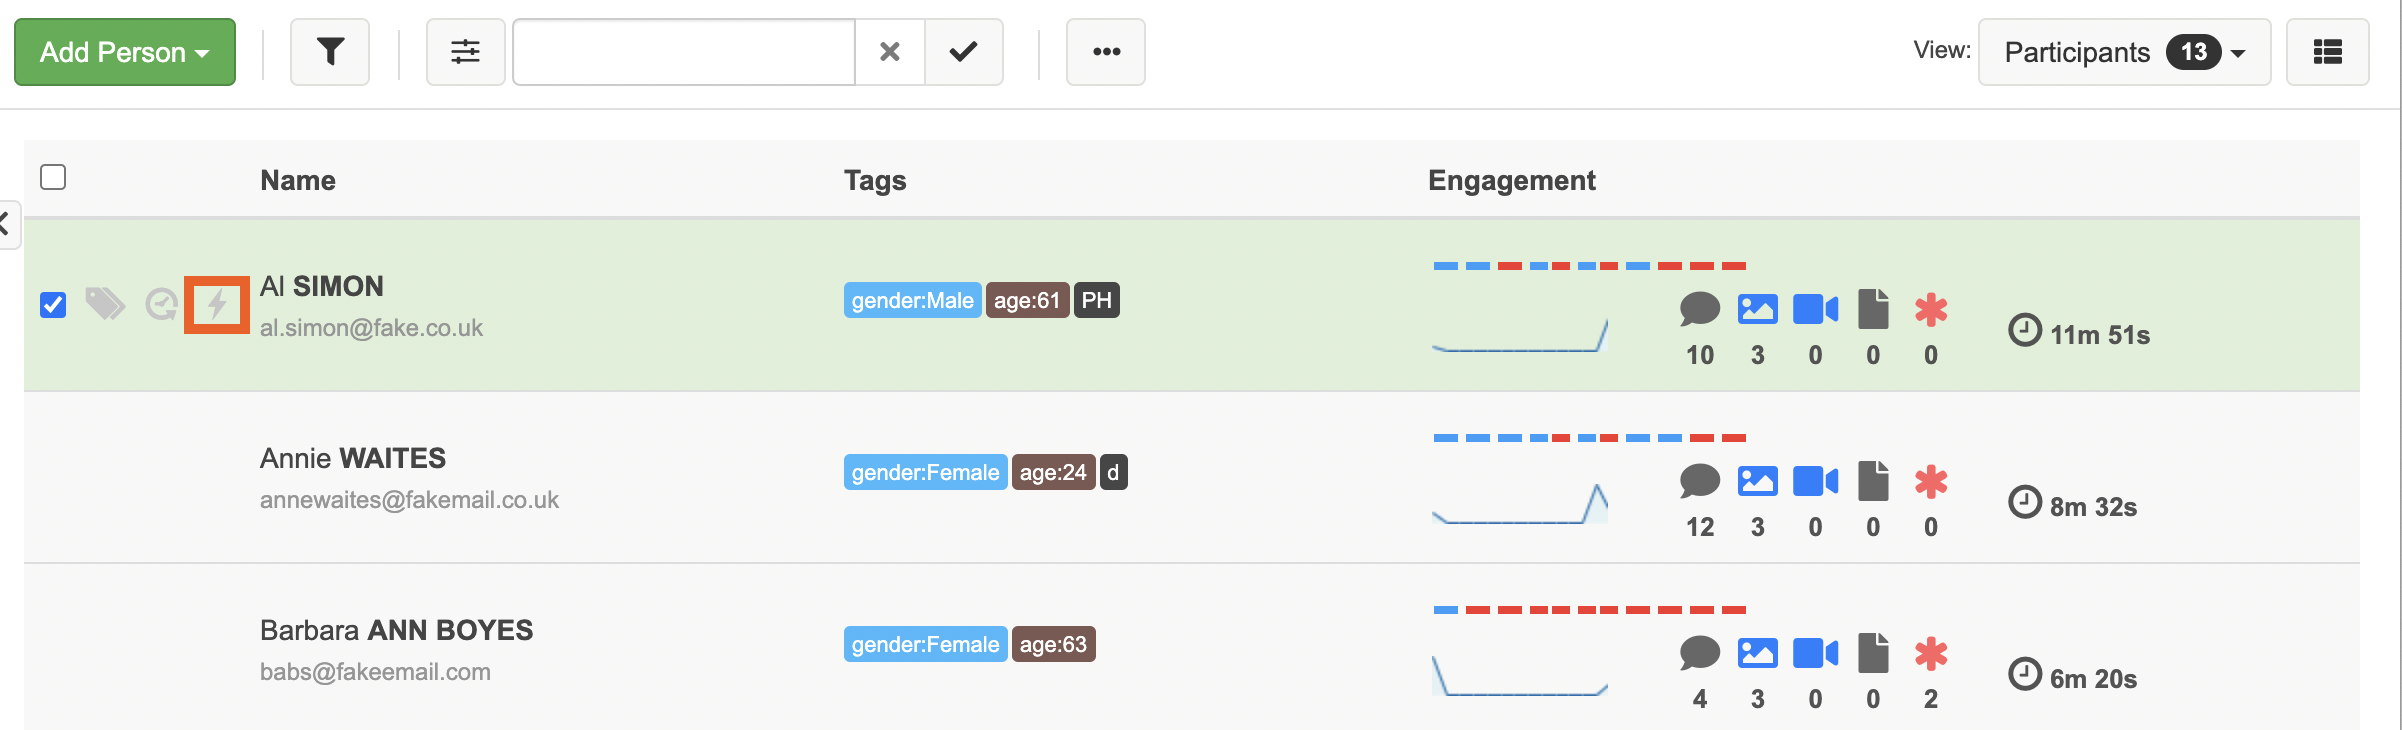
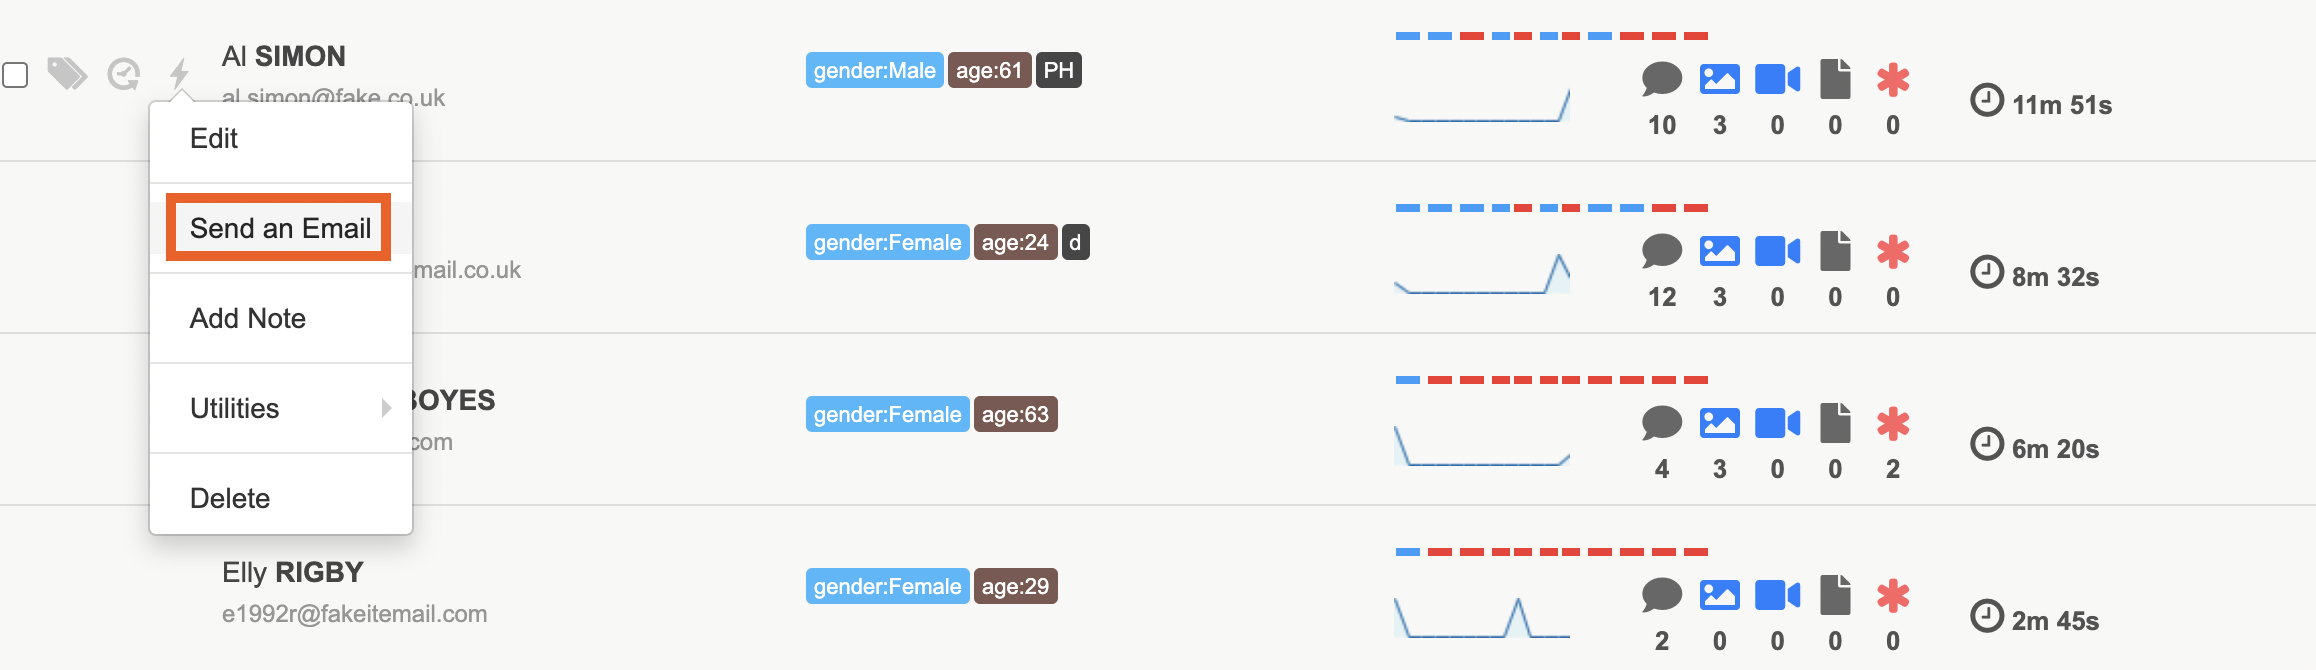
2. From the dropdown menu select 'send an email' to be taken to the email composer window.
Skip ahead to learn more about how to edit/compose an email.
To manually select a number of people to email, follow these steps:
1. You can manually select a number of people, by clicking the checkbox next to name, you can select as many people as you like.
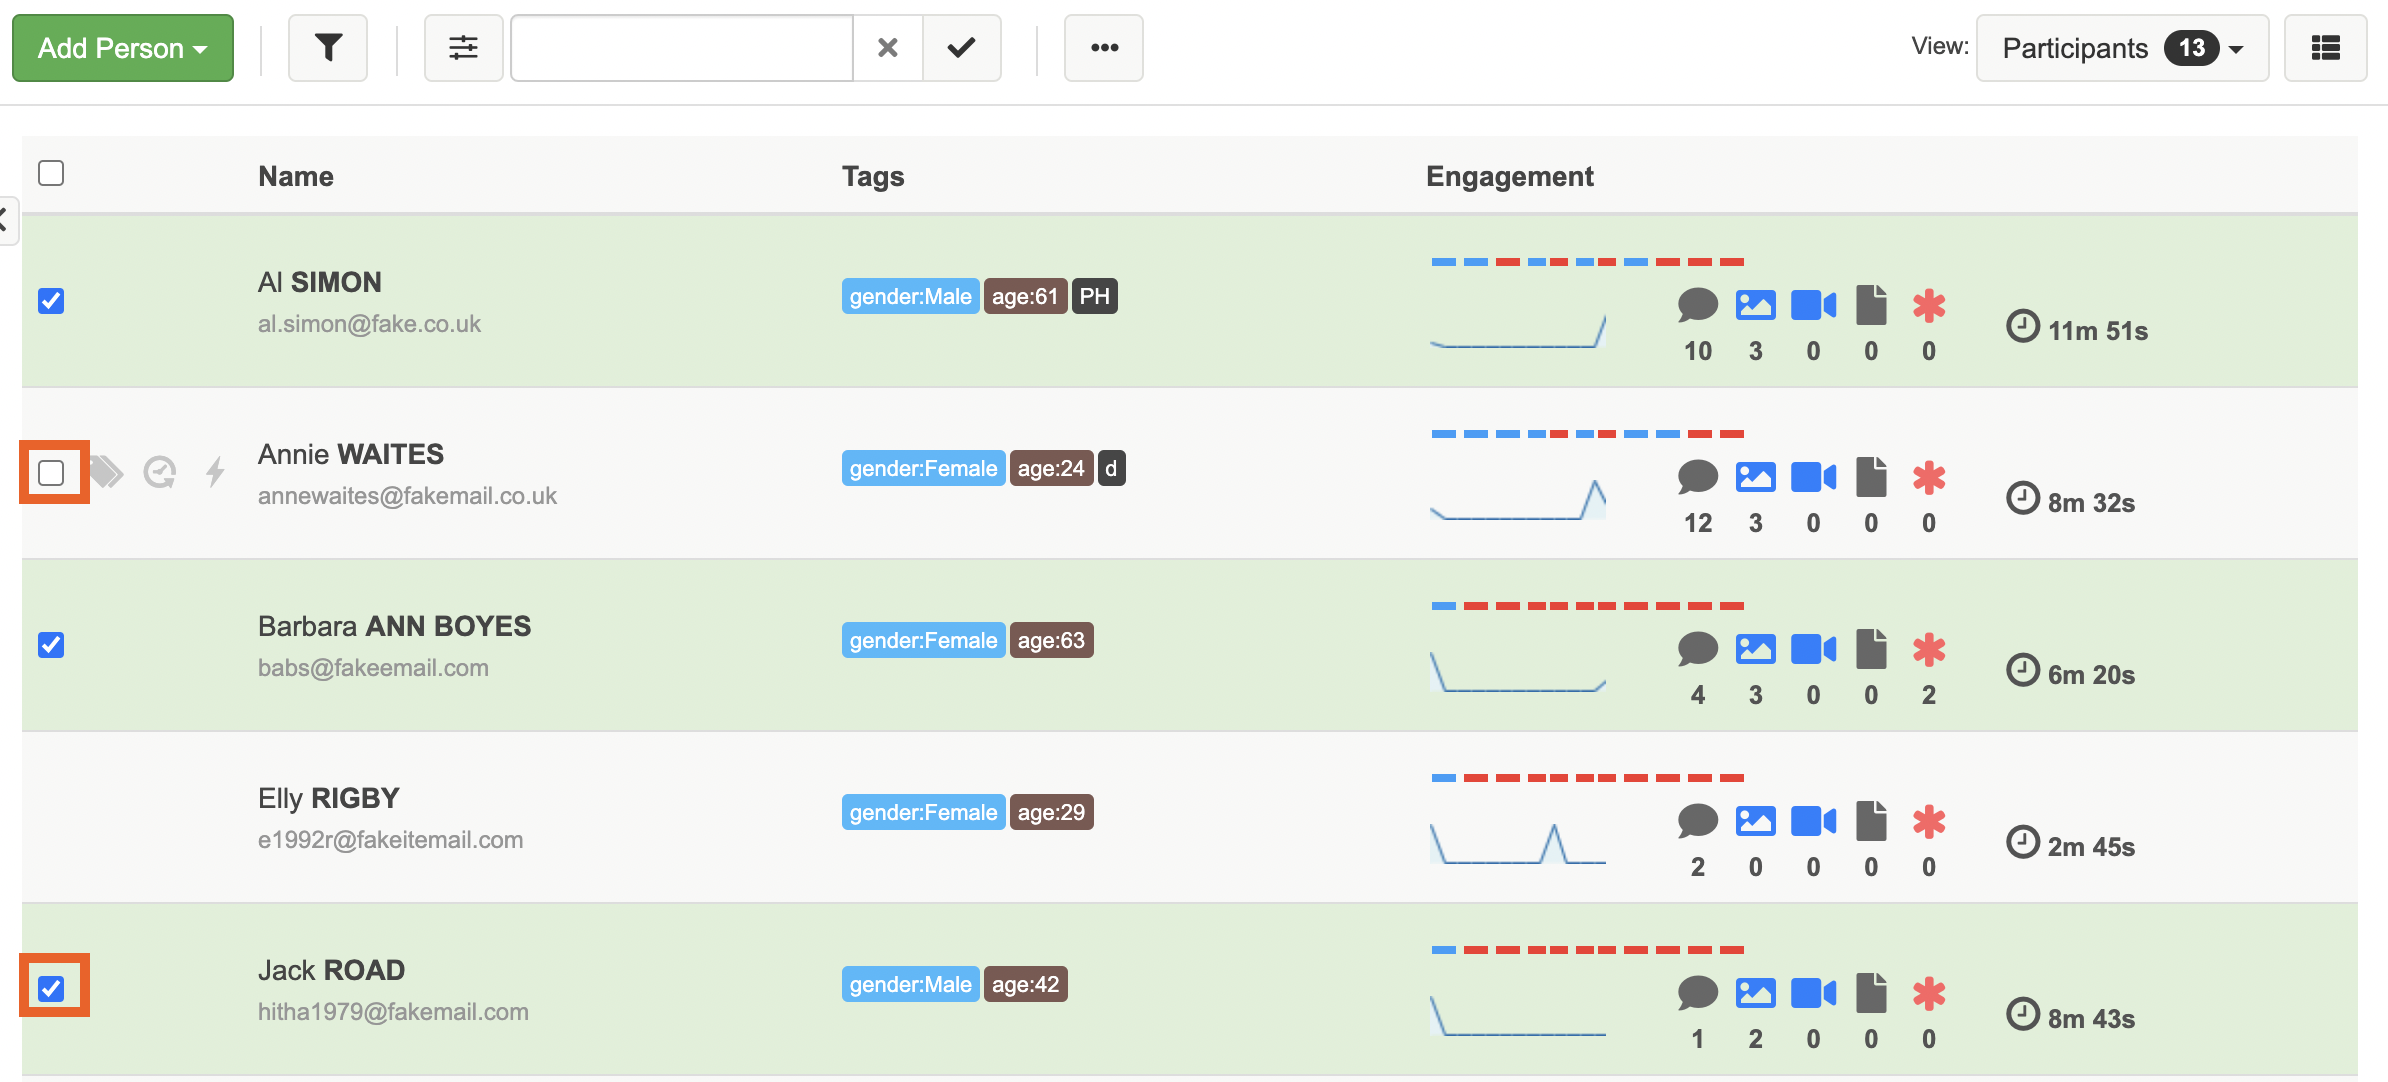
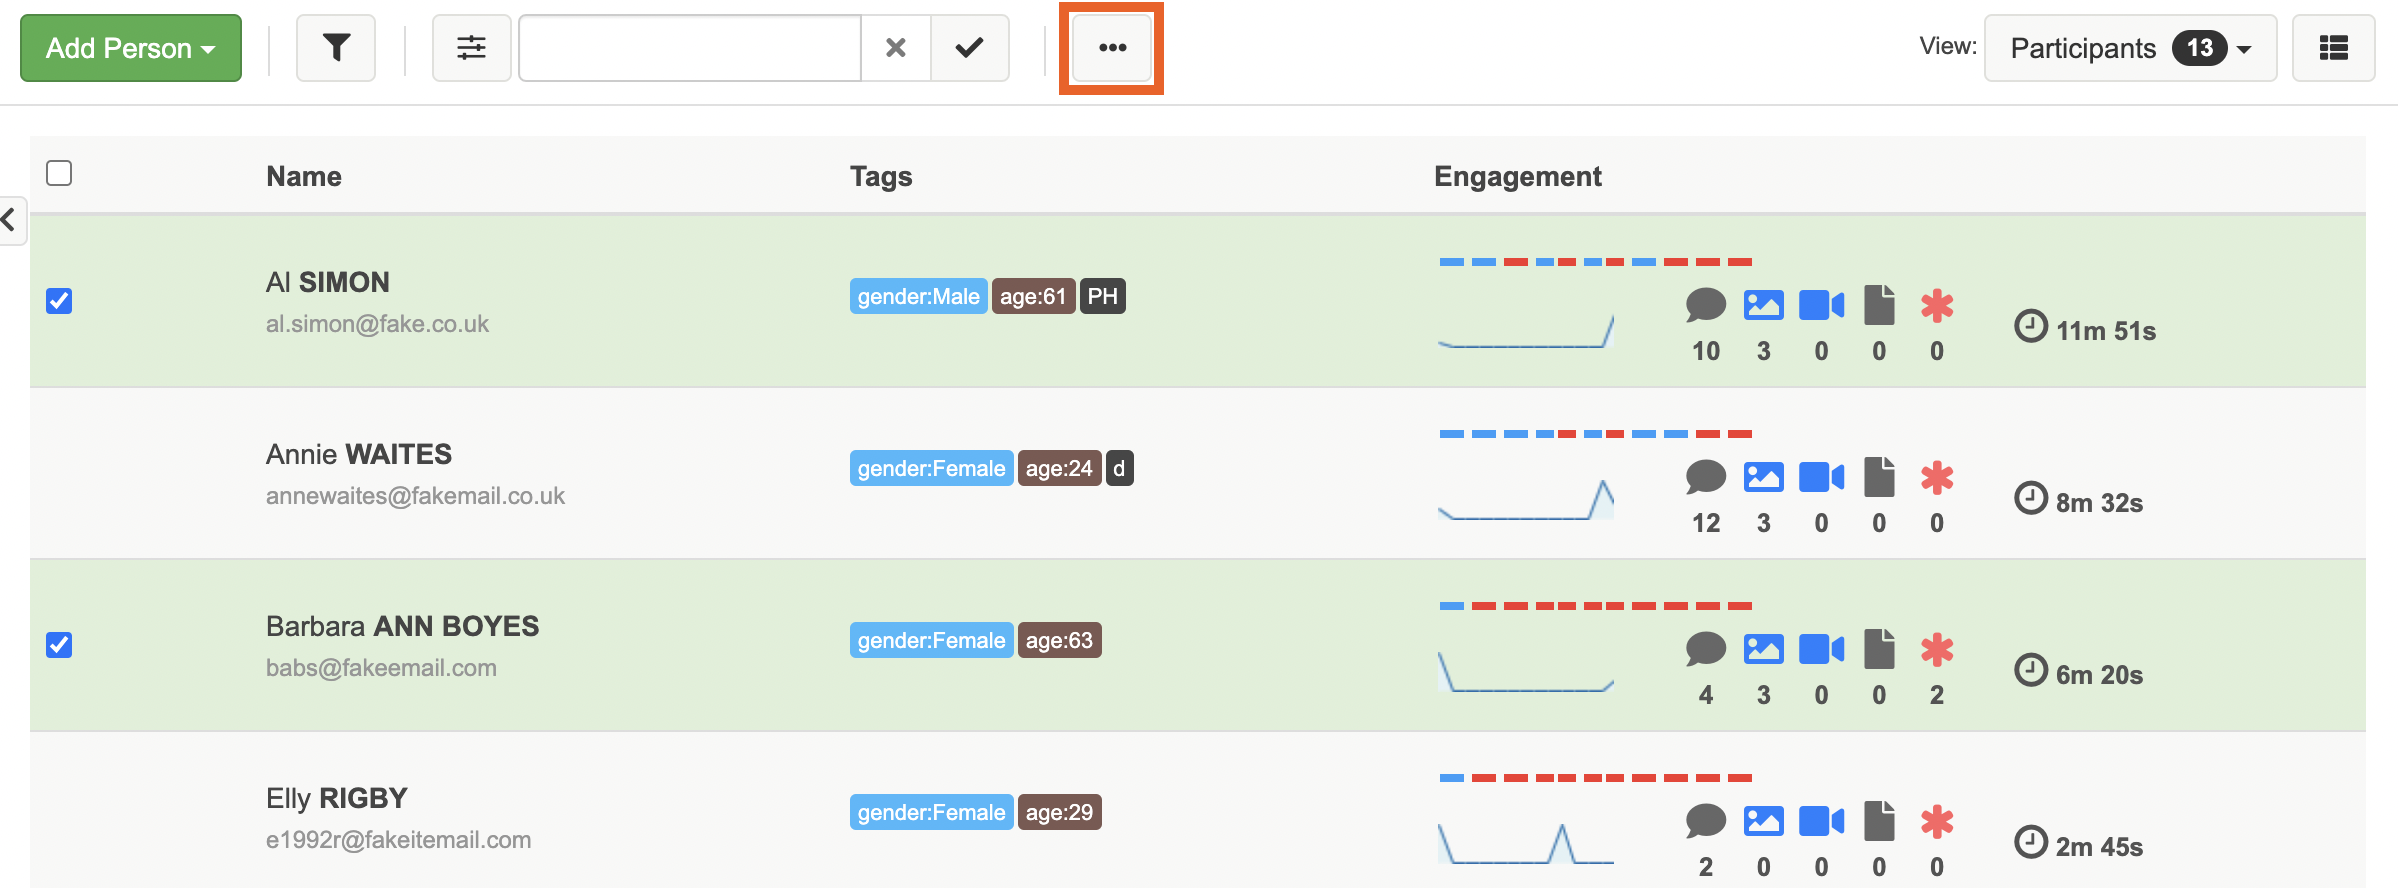
2. Once you have selected the people you would like to email, click on the 3 dots menu above the list of names and next to the search box.
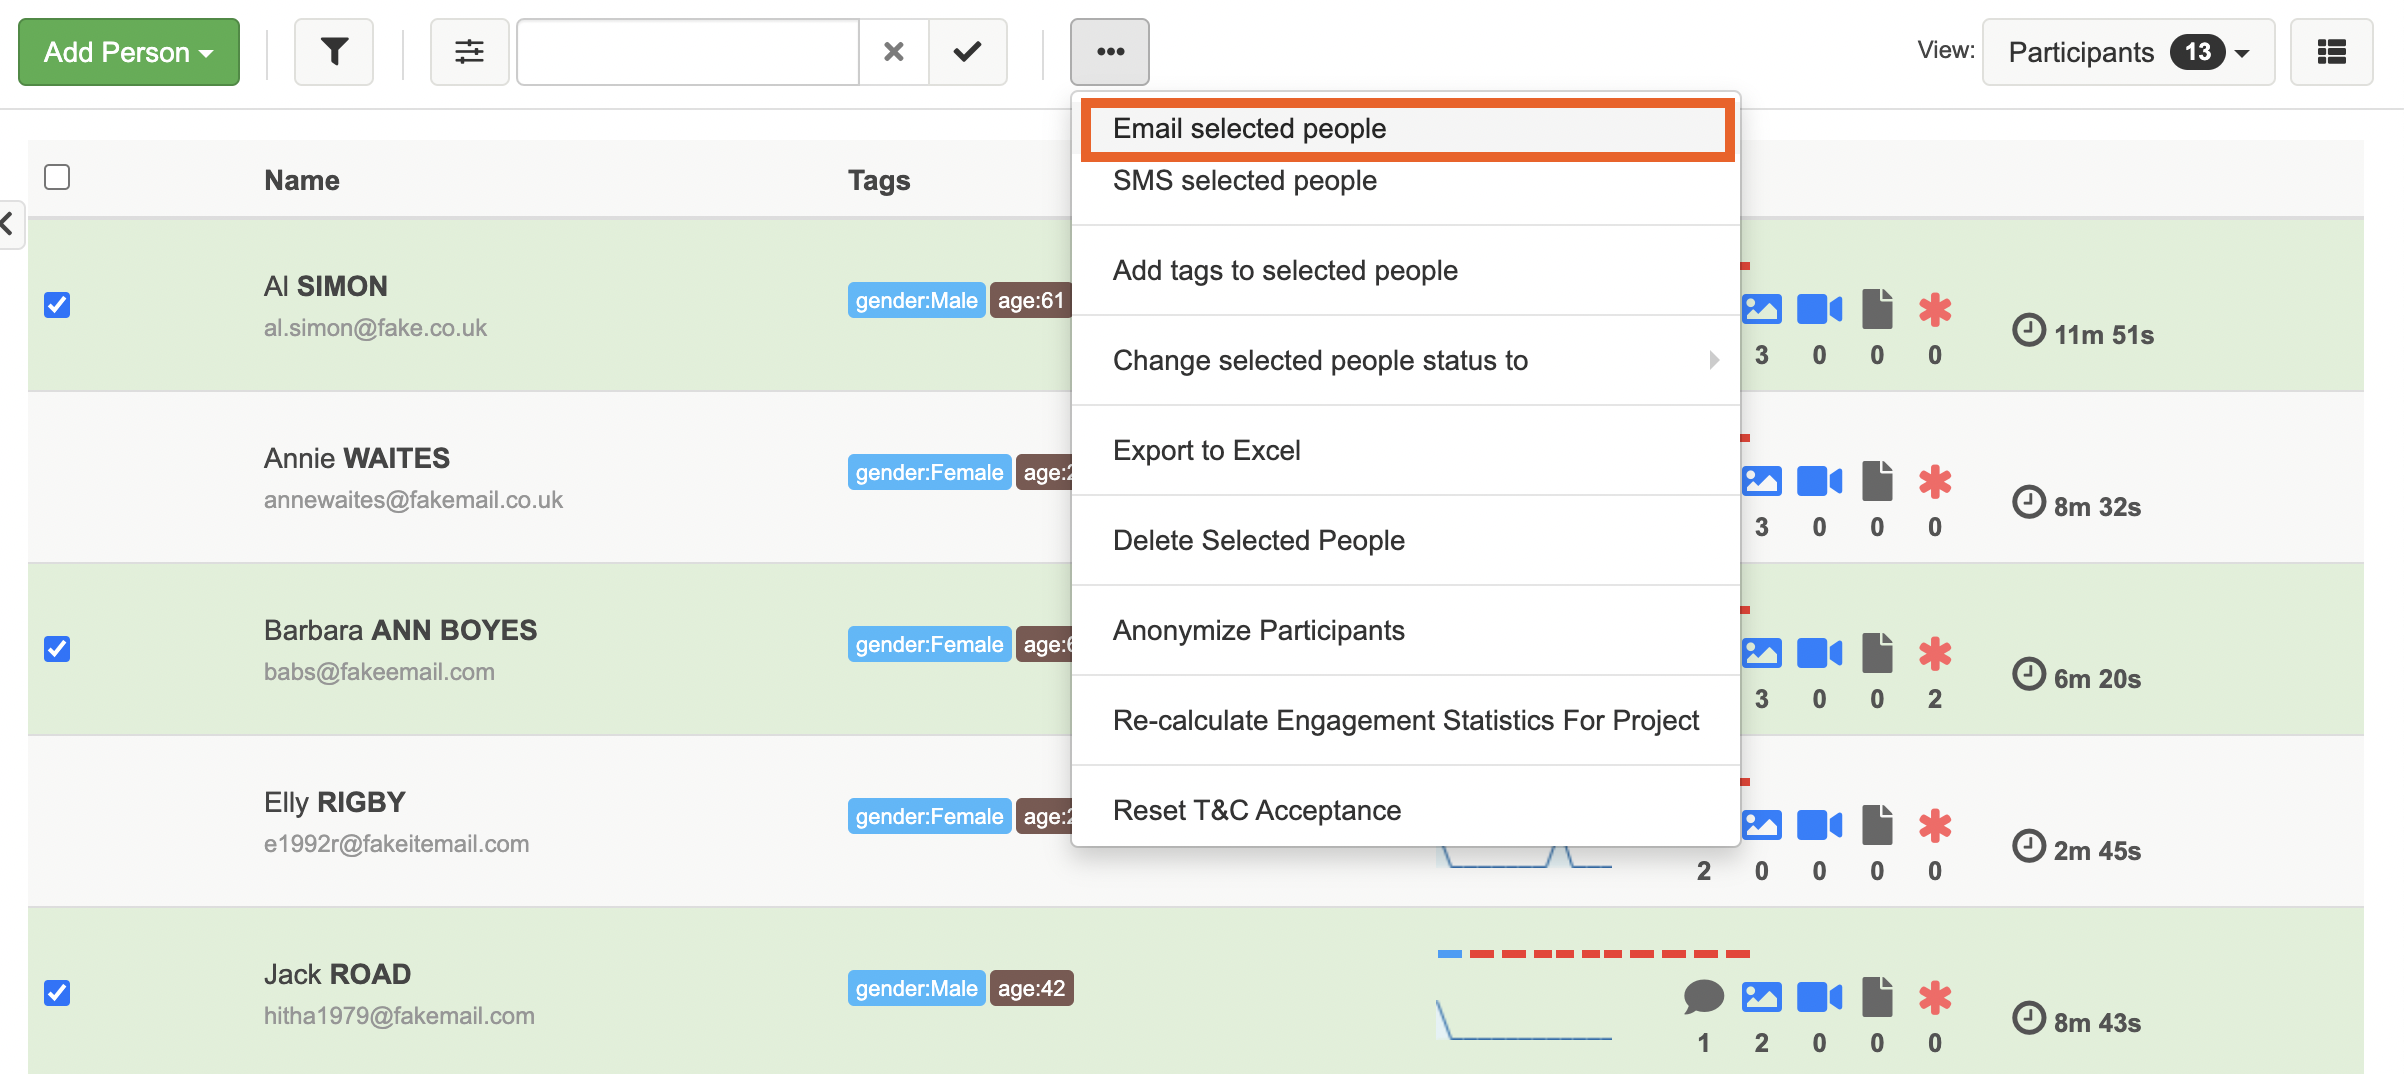
3. From the dropdown menu select, 'Email these selected people' this will take you the email composer window.
Skip ahead to learn more about how to edit/compose an email.
There are times when you’ll want to send an email to a group of people, such as sending invitation links when a project goes live. We recommend setting or scheduling your project to go live before sending out these emails.
To select a group of people to email, follow these steps:
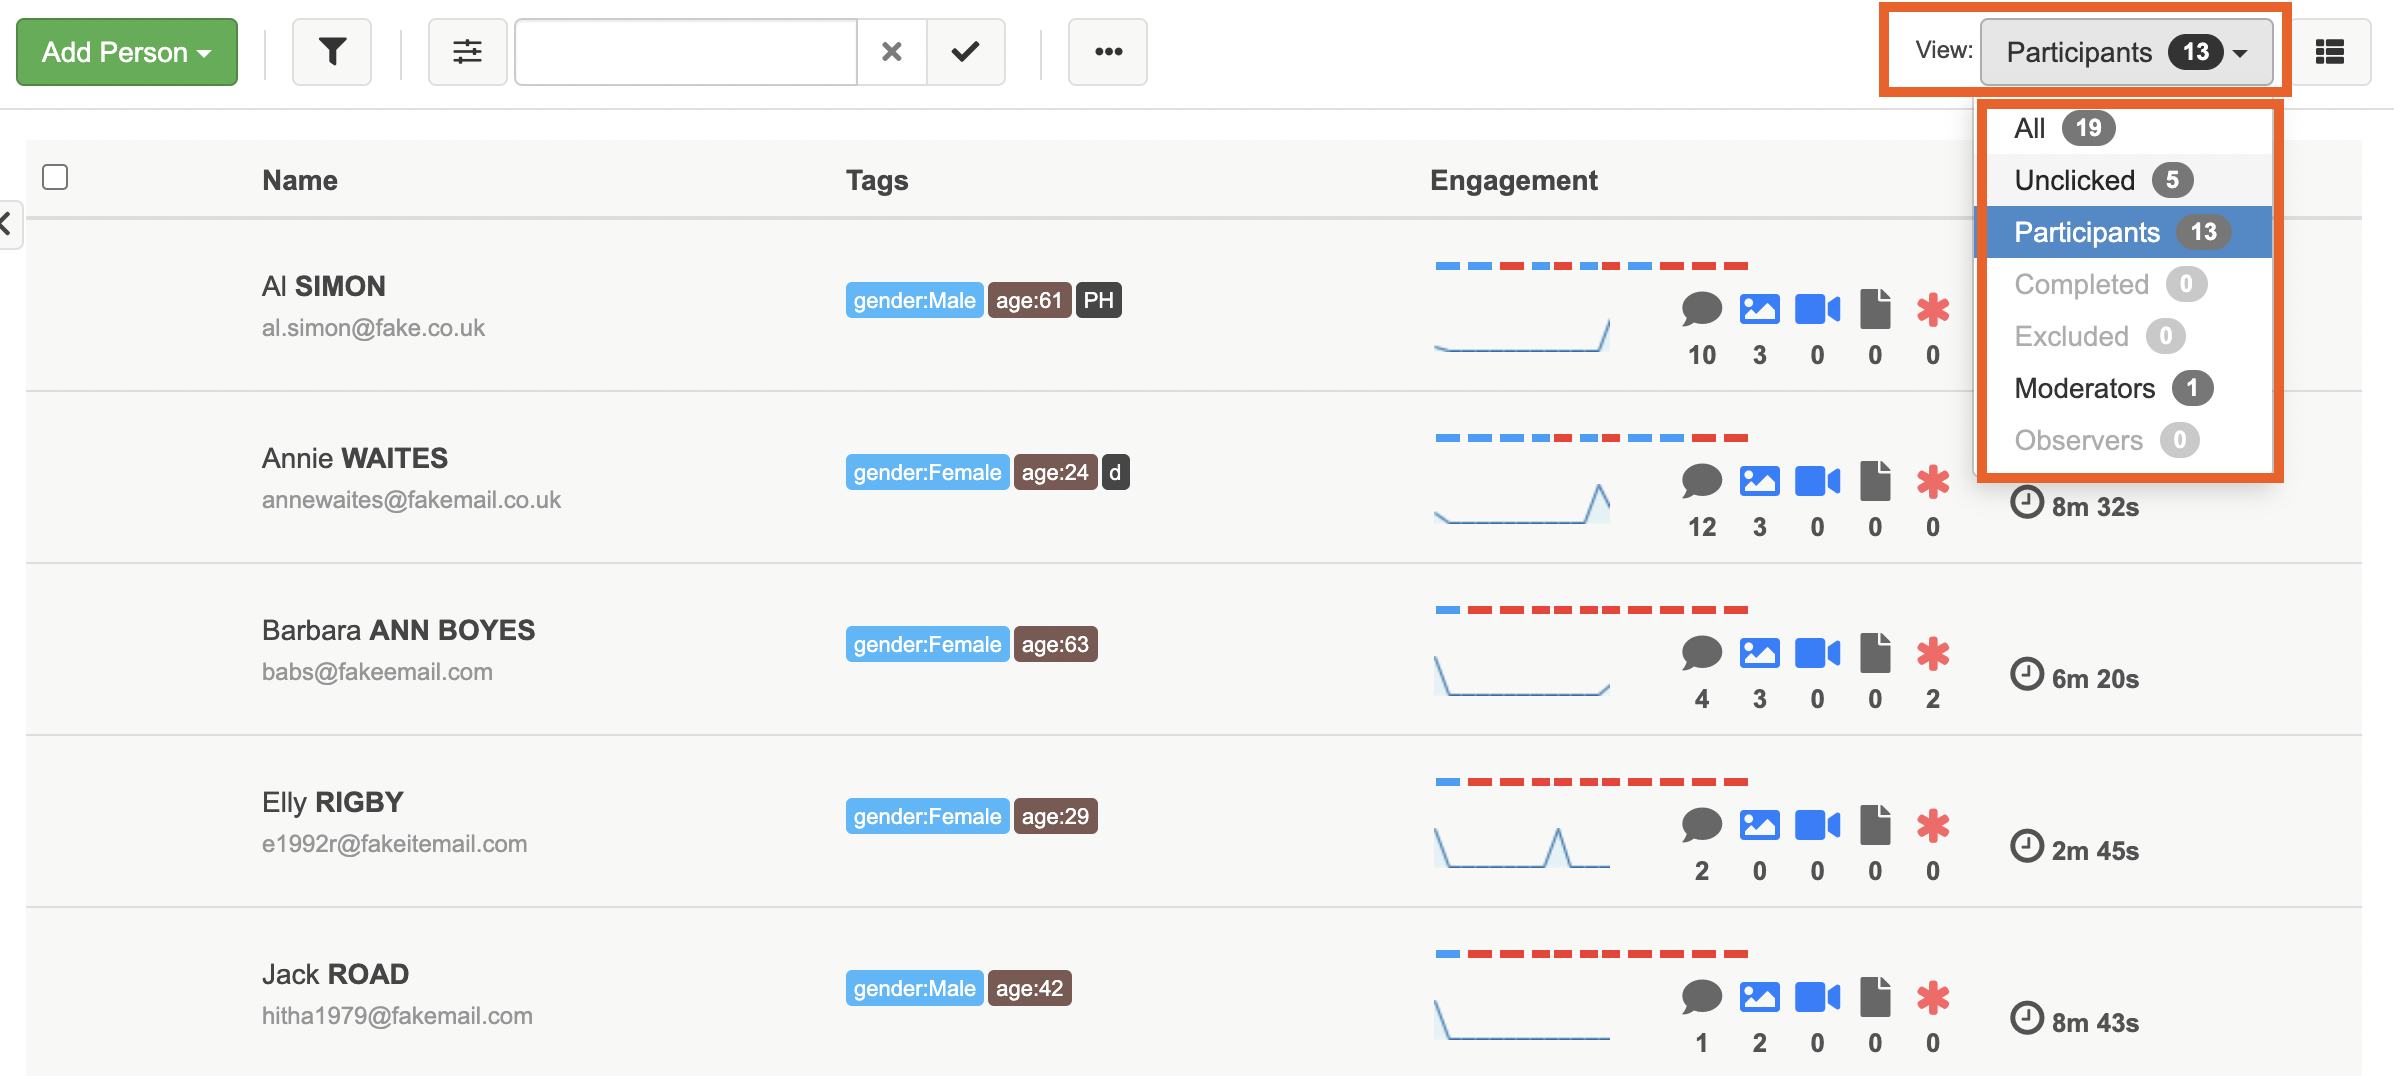
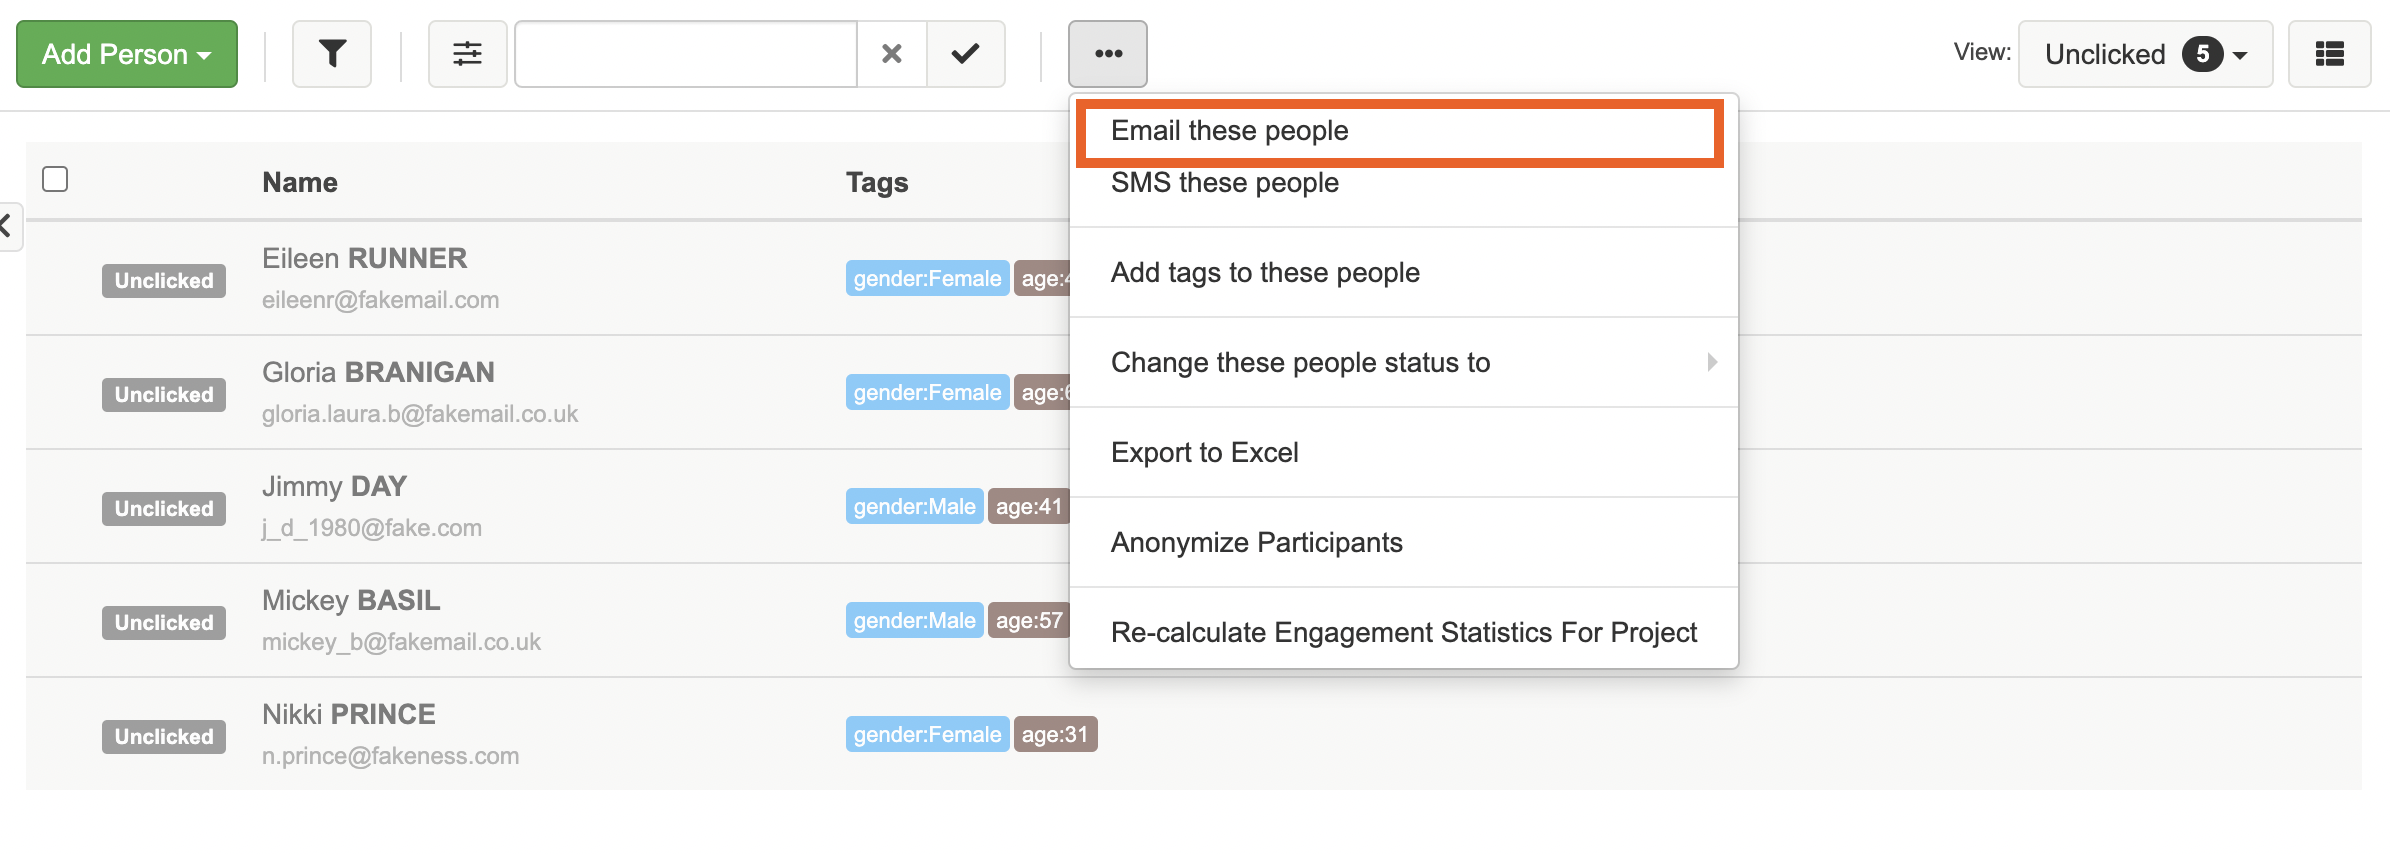
1. First choose the group you’d like to email, this can unclicked, participants, moderators or observers. Then in the people browse you can change your view to show the group of people you’d like to email.
TIP: By 'Unclicked' we mean those participants who have yet to click on their link and enter the platform. You will want to send out invitation links to everyone who is 'Unclicked'
2. Once you have changed your view, to reflect the group of people you are emailing. Click on the 3 dots menu above the list of names and next to the search box.
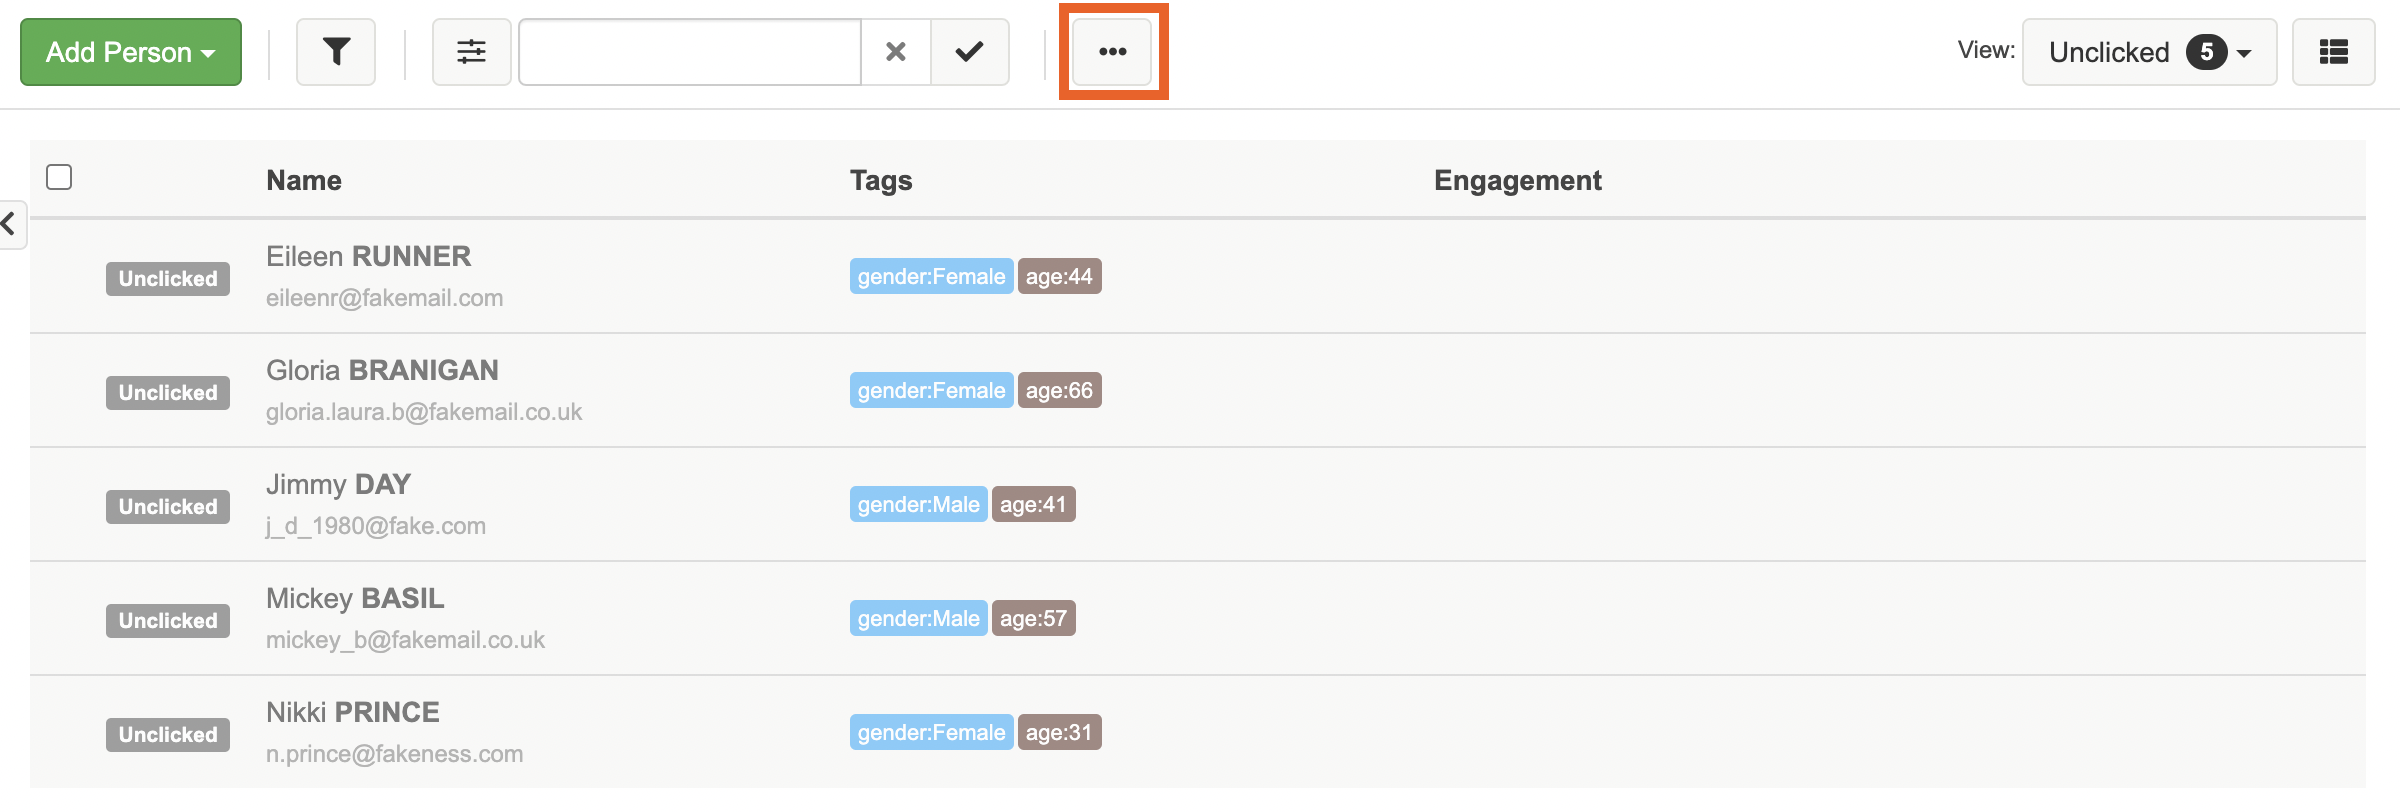
3. From the dropdown menu select, 'Email these people' this will take you the email composer window.
Skip ahead to learn more about how to edit/compose an email.
TIP: You can also email people from the project dashboard (to reach the project dashboard click on the home icon on the left hand side menu).
To do this: Select the three dots that appear next to the person’s name when you hover over them and press “send an email”. You will be taken to the email composer window.
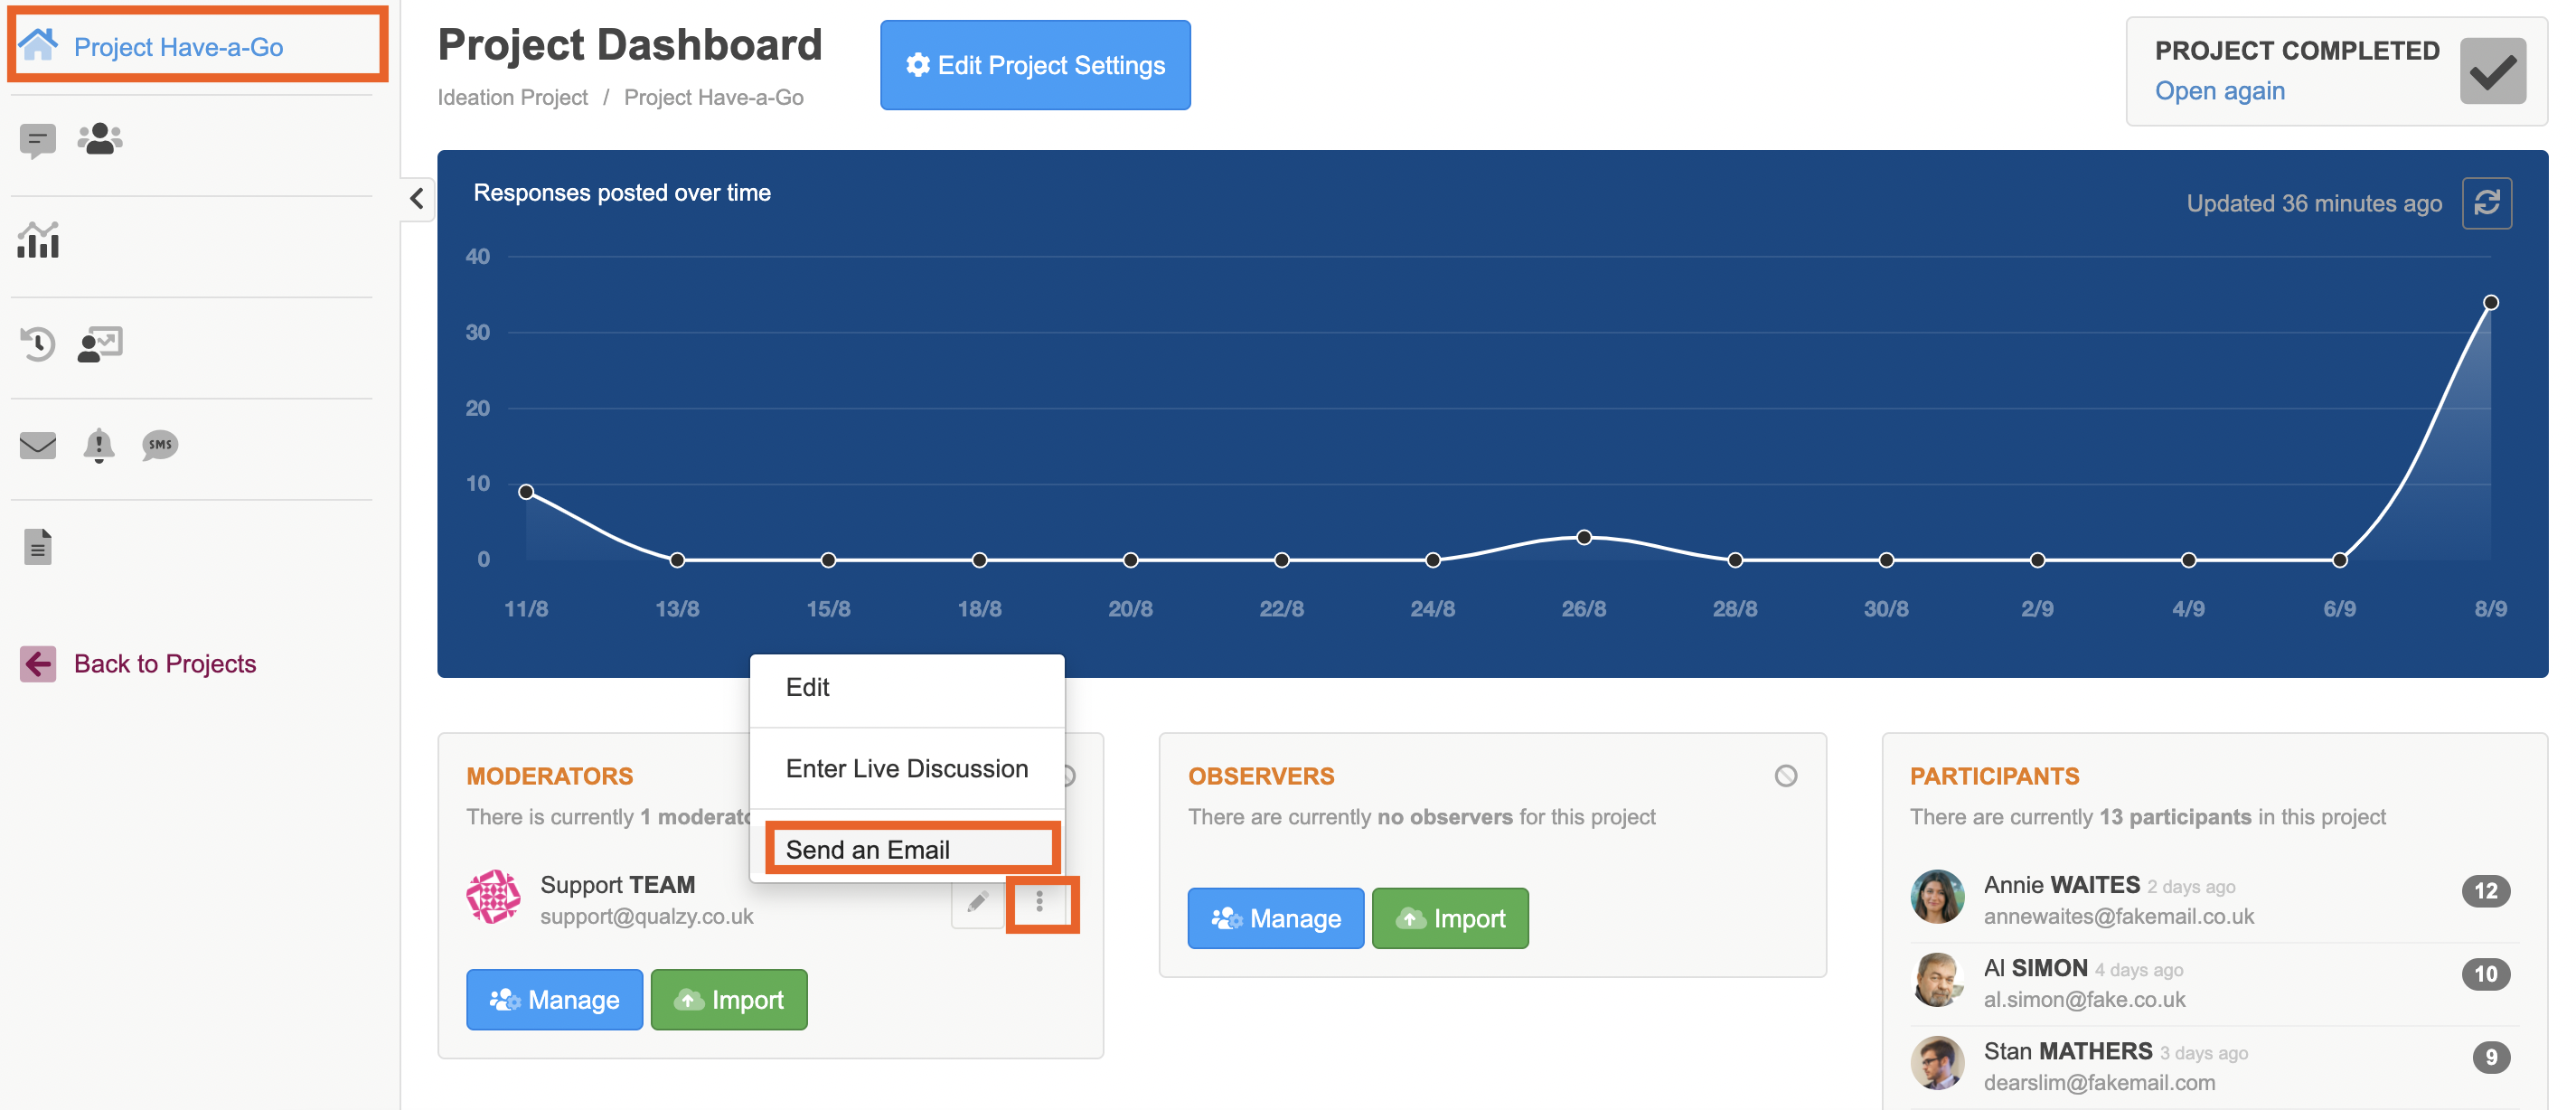
NOTE: The Dashboard will only show the 10 most active from each type of person, you can press the “more” button here to be taken to the people browse where you will find a list of all the people in the project.
After you have selected who you would like to email, you will then need to edit / compose your email in our email composer window.
NOTE: If the person or people are all one “type” of person, such as observers, the default email in the editor will be tailored to them. If they are a mix of “types” of person, the default will be a generic email.
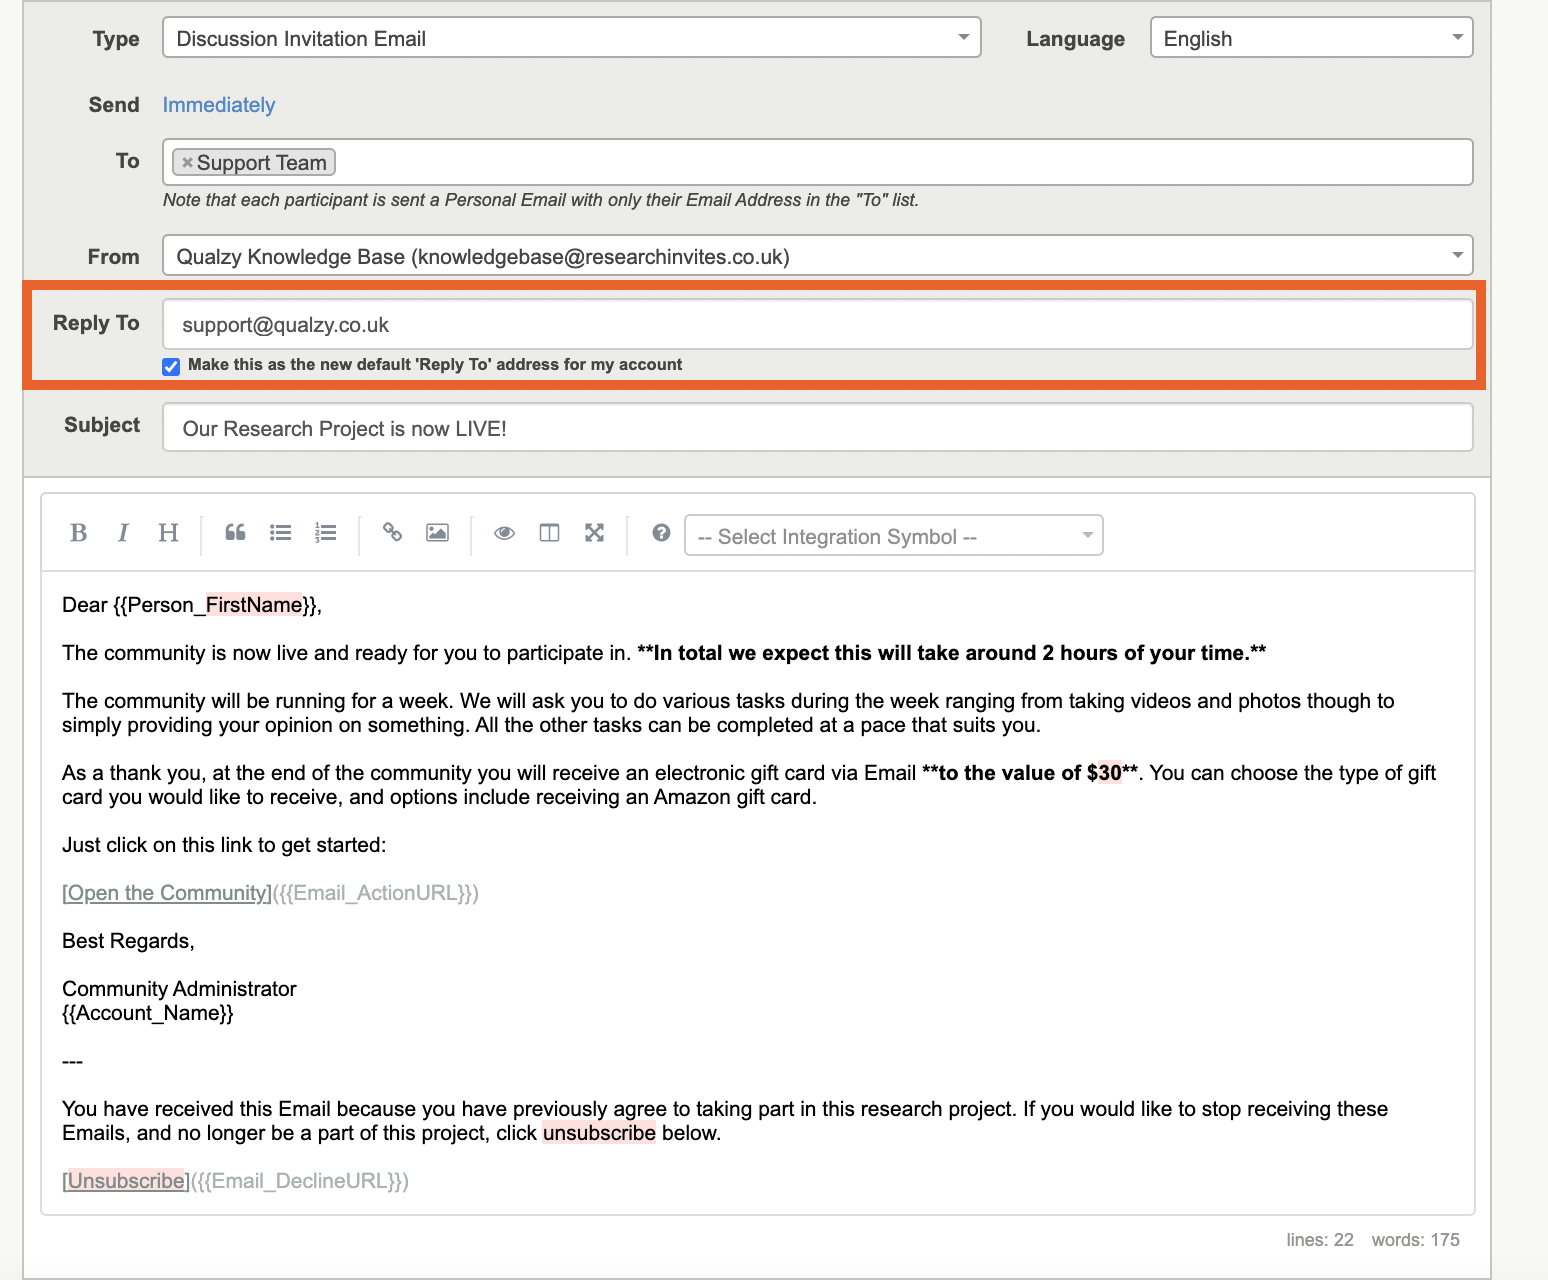
1. You can edit the email text, leaving in place the words in any brackets (),[] or {} as these tell the platform to change these into set actions.
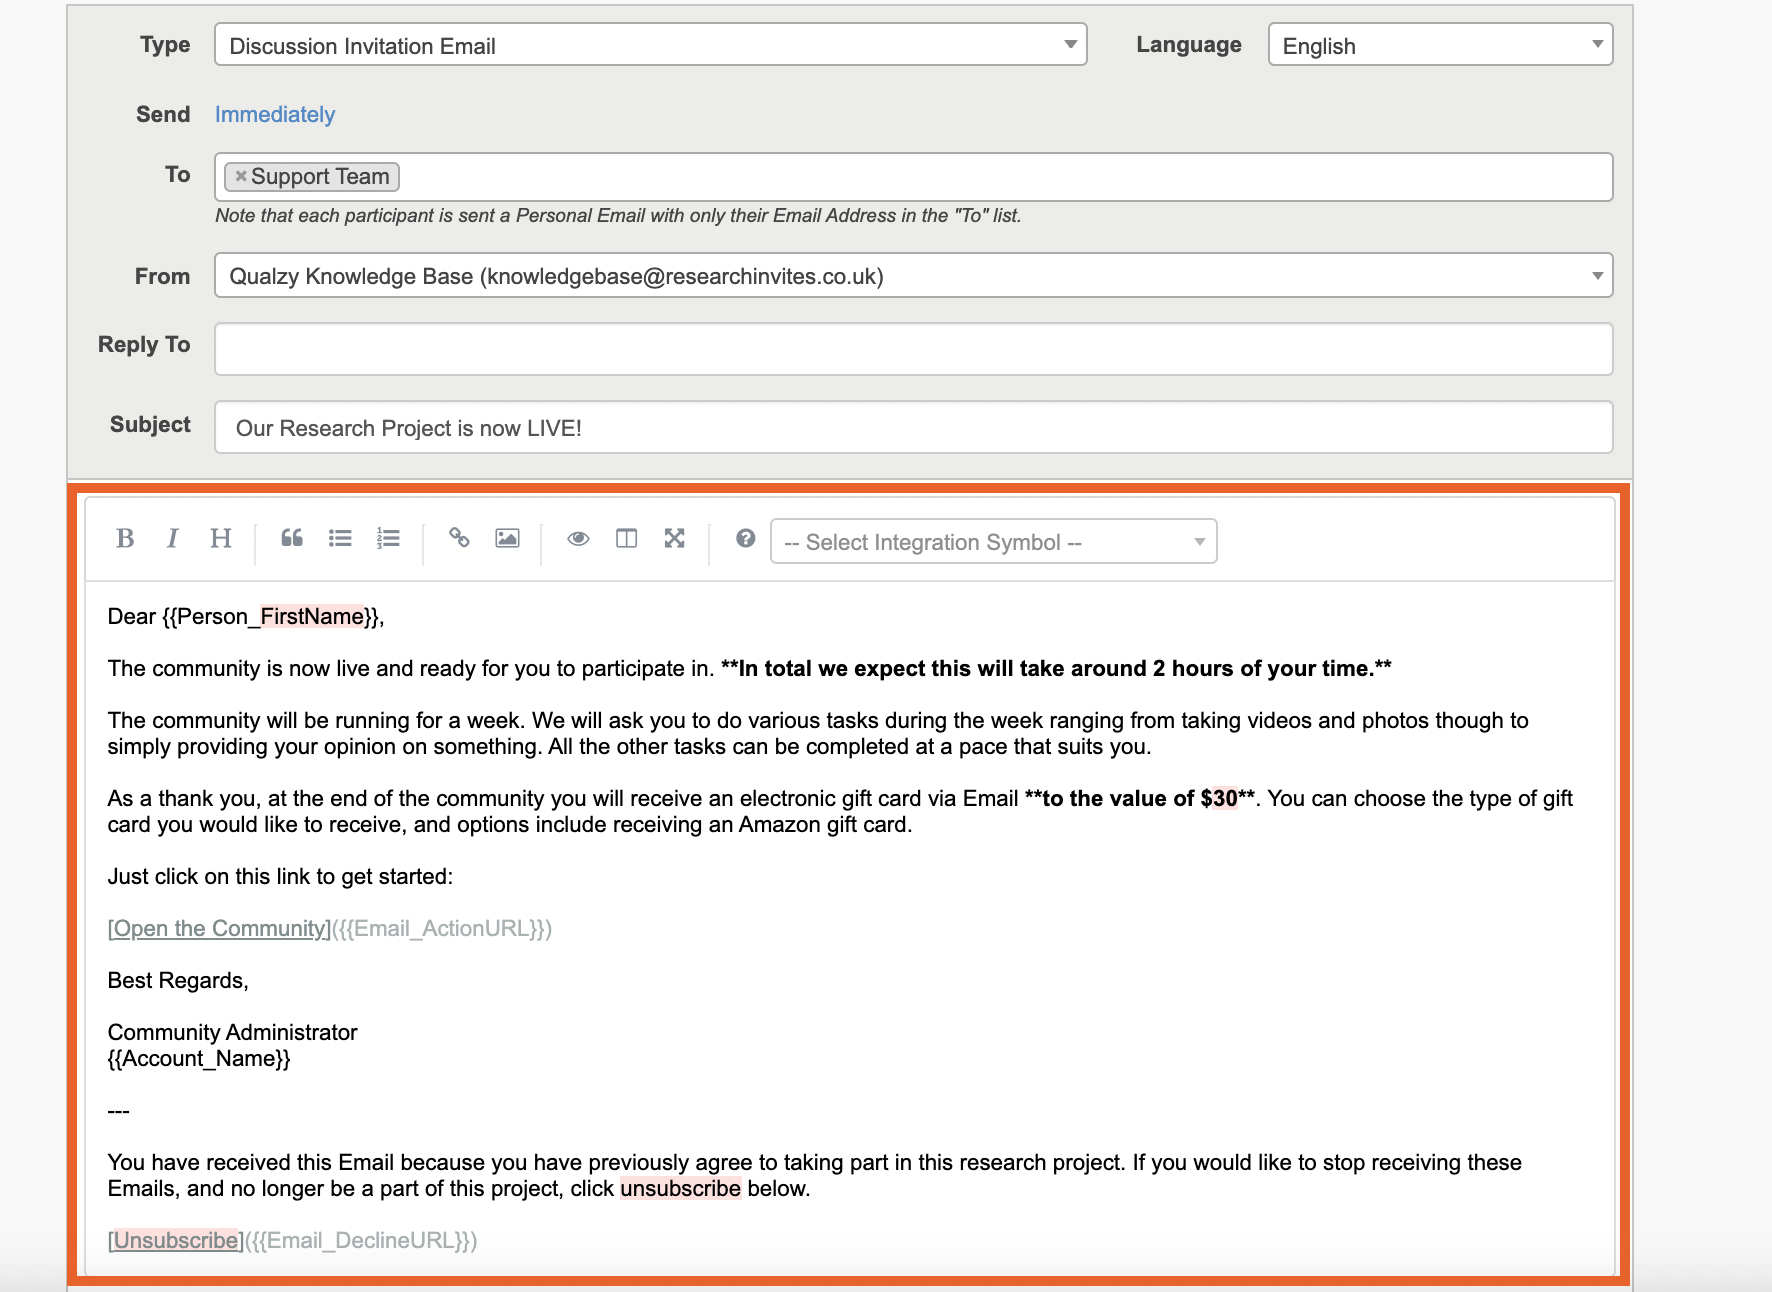
2. You can change the type of email you are sending out by selecting the template from the drop down menu. For example if you are sending out invitation links you will want to use the 'Discussion Invitation Email' template but if you are sending out a general email you can use the 'Discussion General Email' template.

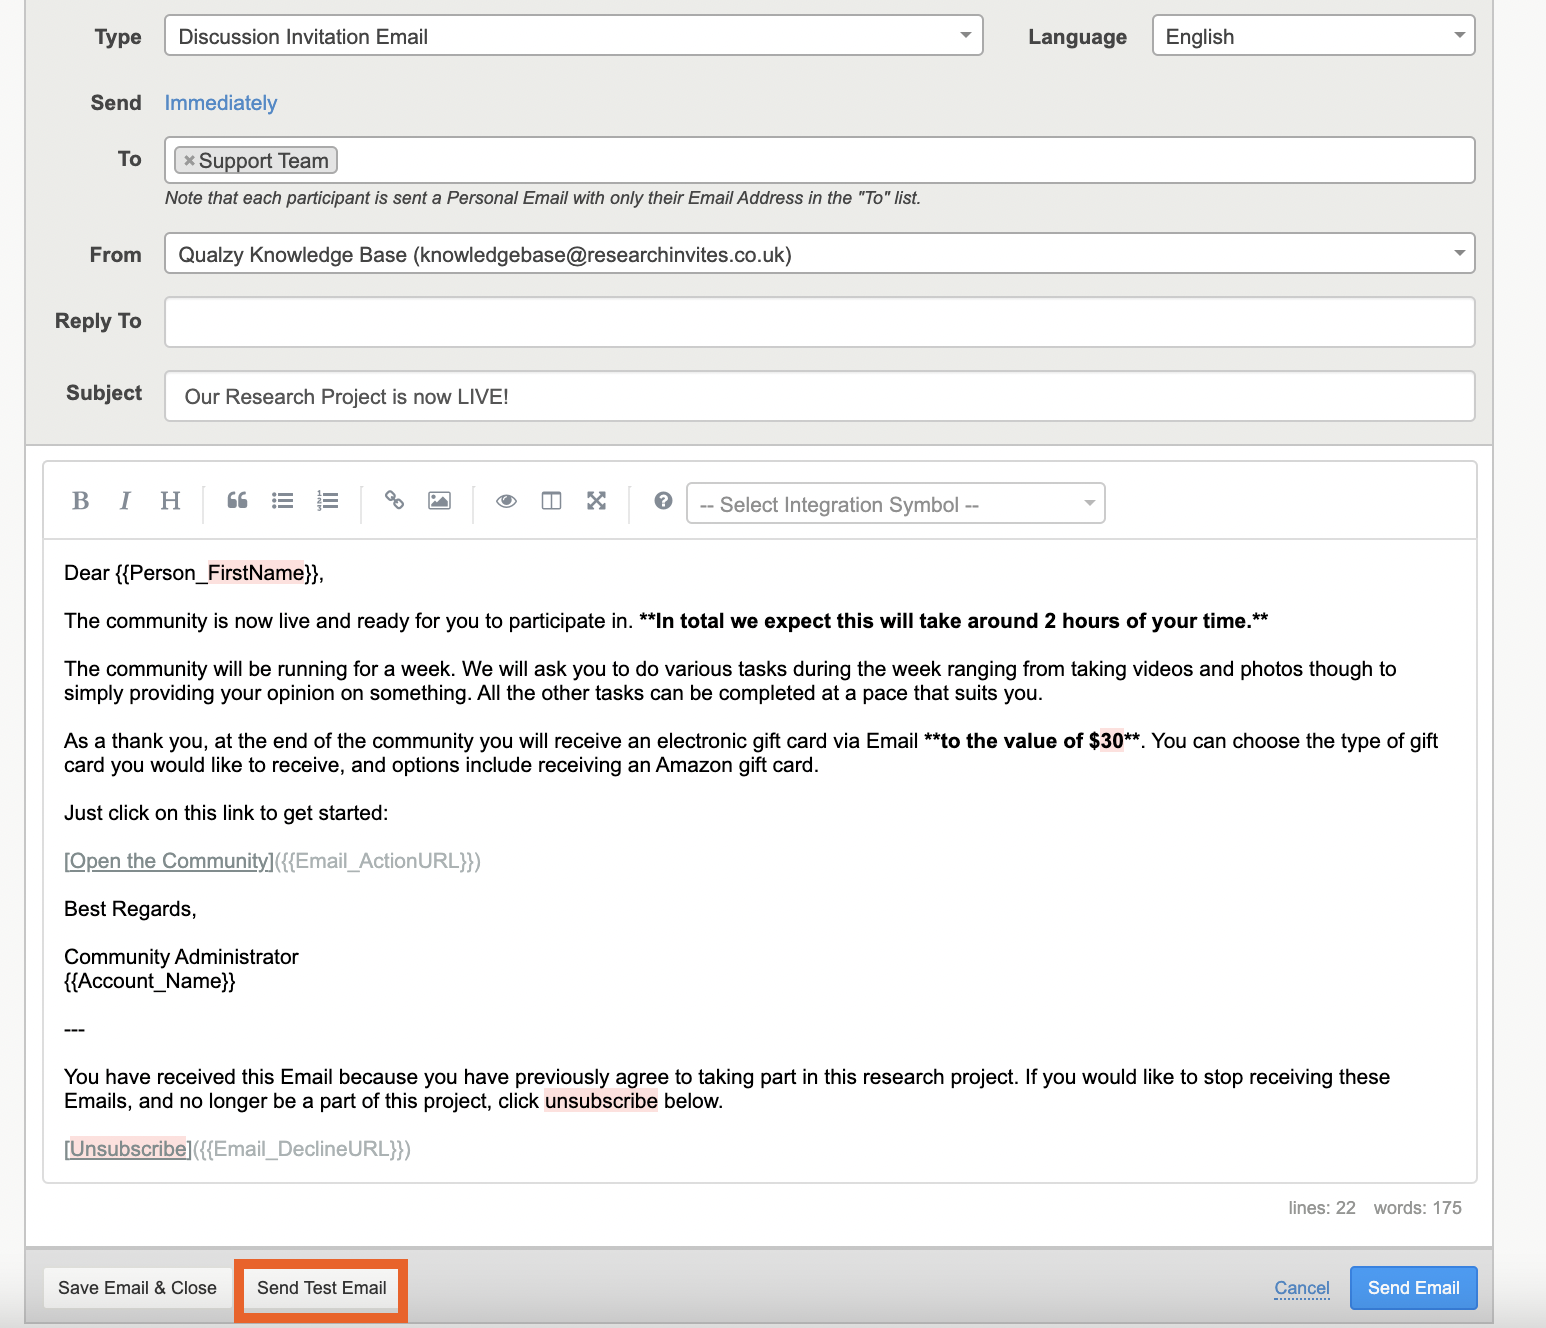
3. If you’d like to “preview” your email, you can press “send test email” and you will be sent an email to the address you’re logged in with.
4. If you’d like any replies to the email from people to go into a certain inbox,you can change the address in the “reply to” section.
You can also make this the default reply to address if you would like all replies to go to that specific inbox.
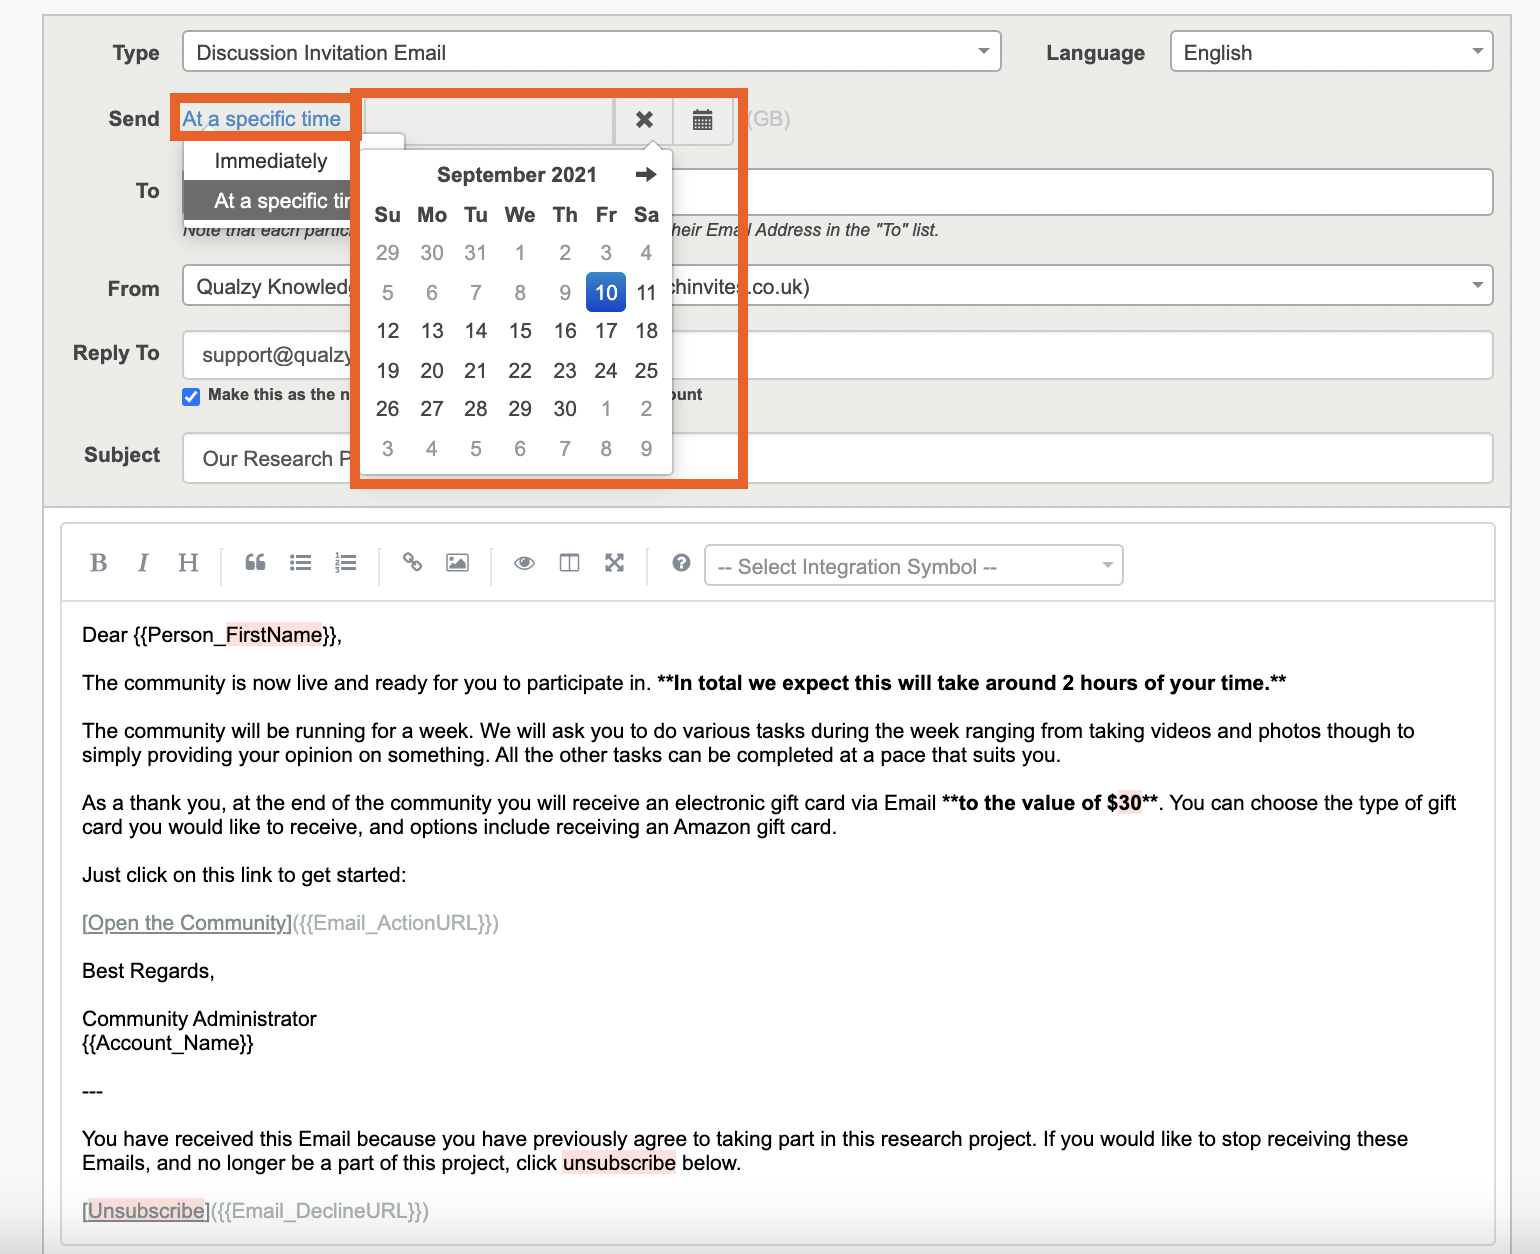
Now you have all of your email content, and you have selected the people you would like to send the email to, you can schedule your email to go out at any time that suits you.
1. If your project is already open, or you haven’t scheduled it to open, the default is to send your email immediately. You can change this by clicking “immediately” and selecting a time and date. This will be set to the project’s set local time.
2. If your project is scheduled to open in the future, the default sending time will be for when the project opens. Again, you can change this to “immediately” by clicking “at a specific time” or by changing the date.
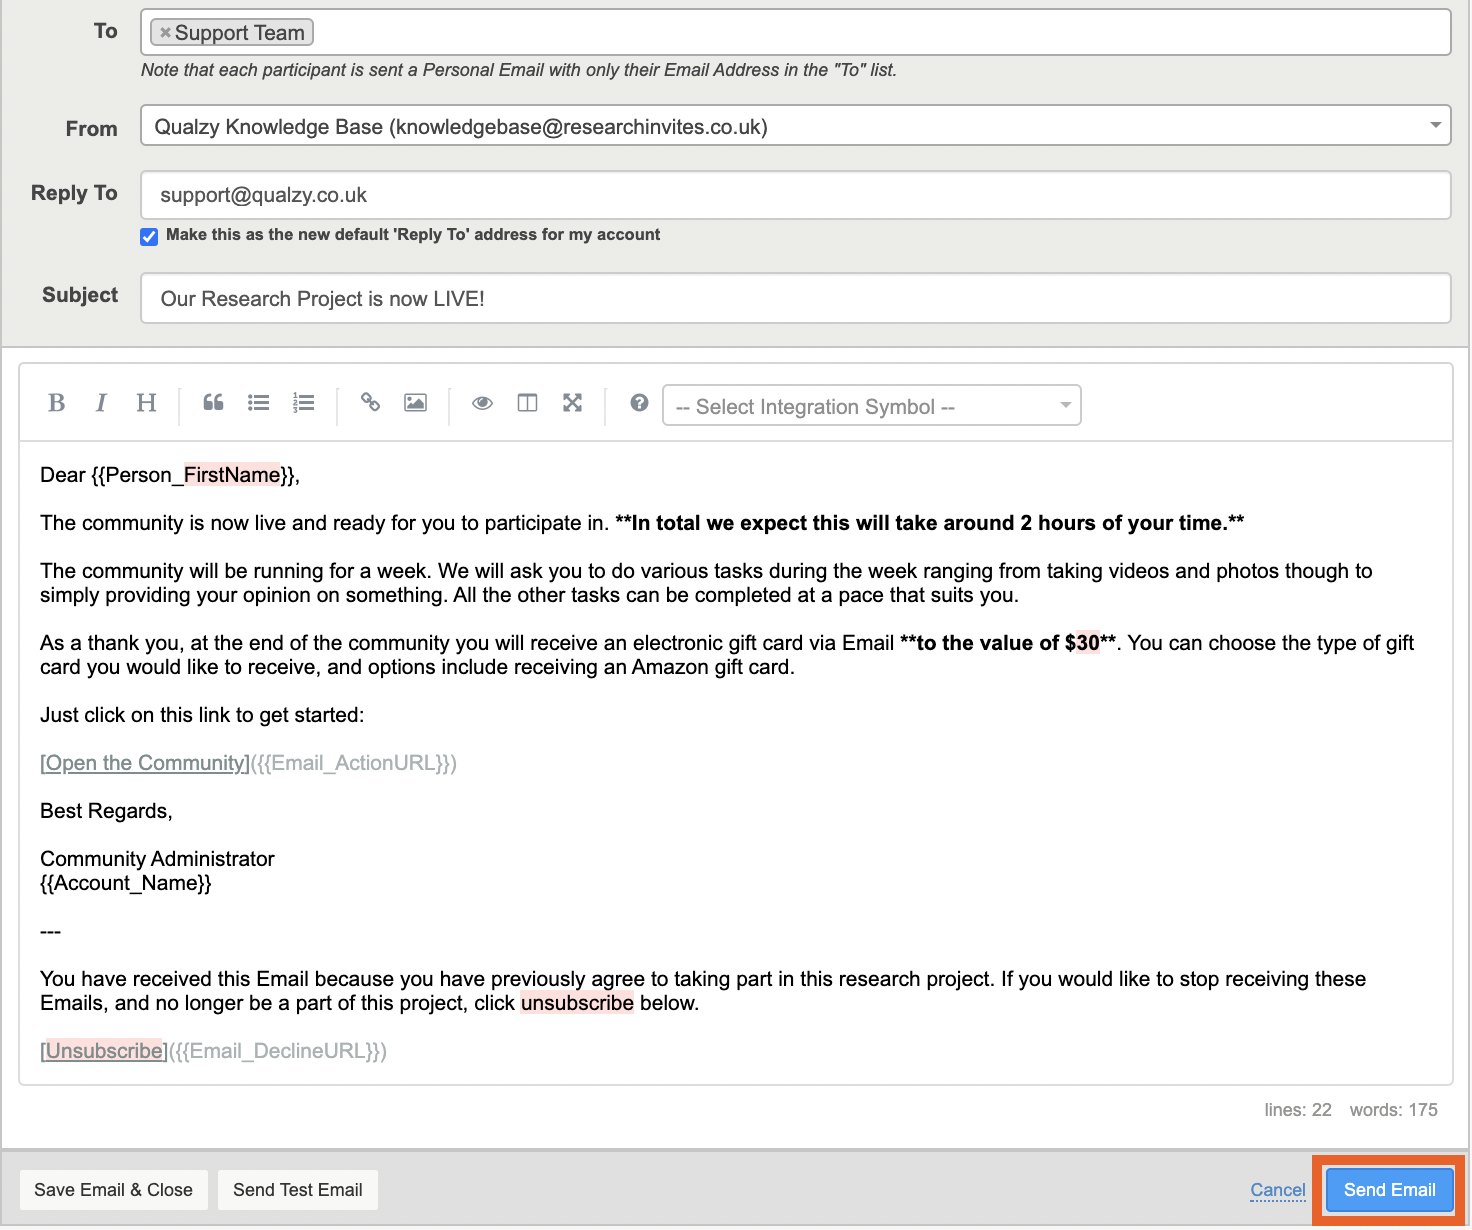
3. Finally once you are happy with the content, who the email is being sent to and what time it is going out you can click on the blue 'Send Email' button.
NOTE: If you have scheduled the email to go out at a certain time, the email will be sent out at the schedule time and not immediately.
If you need any more assistance, or have any questions then please get in touch with our friendly support team who will gladly assist you. You can reach them at hello@qualzy.co.uk