NOTE: There are a couple of areas on the platform where you can import people. This article will take you through the main importing process however getting to this point maybe slightly different depending on which area of the platform you are importing from.
Check out these other articles to know how to get to this point from different areas of the platform.
- How do I get to the main import screen via the people browse?
- How do I get to the main import screen via the project dashboard?
You can also manually add people to the platform in a couple of different areas. You can read the articles below to find out how to do this.
Once you have your Excel spreadsheet filled with your participant data and into the correct format and you are on the people import screen, the next step will be to import the spreadsheet onto the platform and begin the import process.
To do this:
1. Drag and drop/upload your Excel spreadsheet ready for importing.
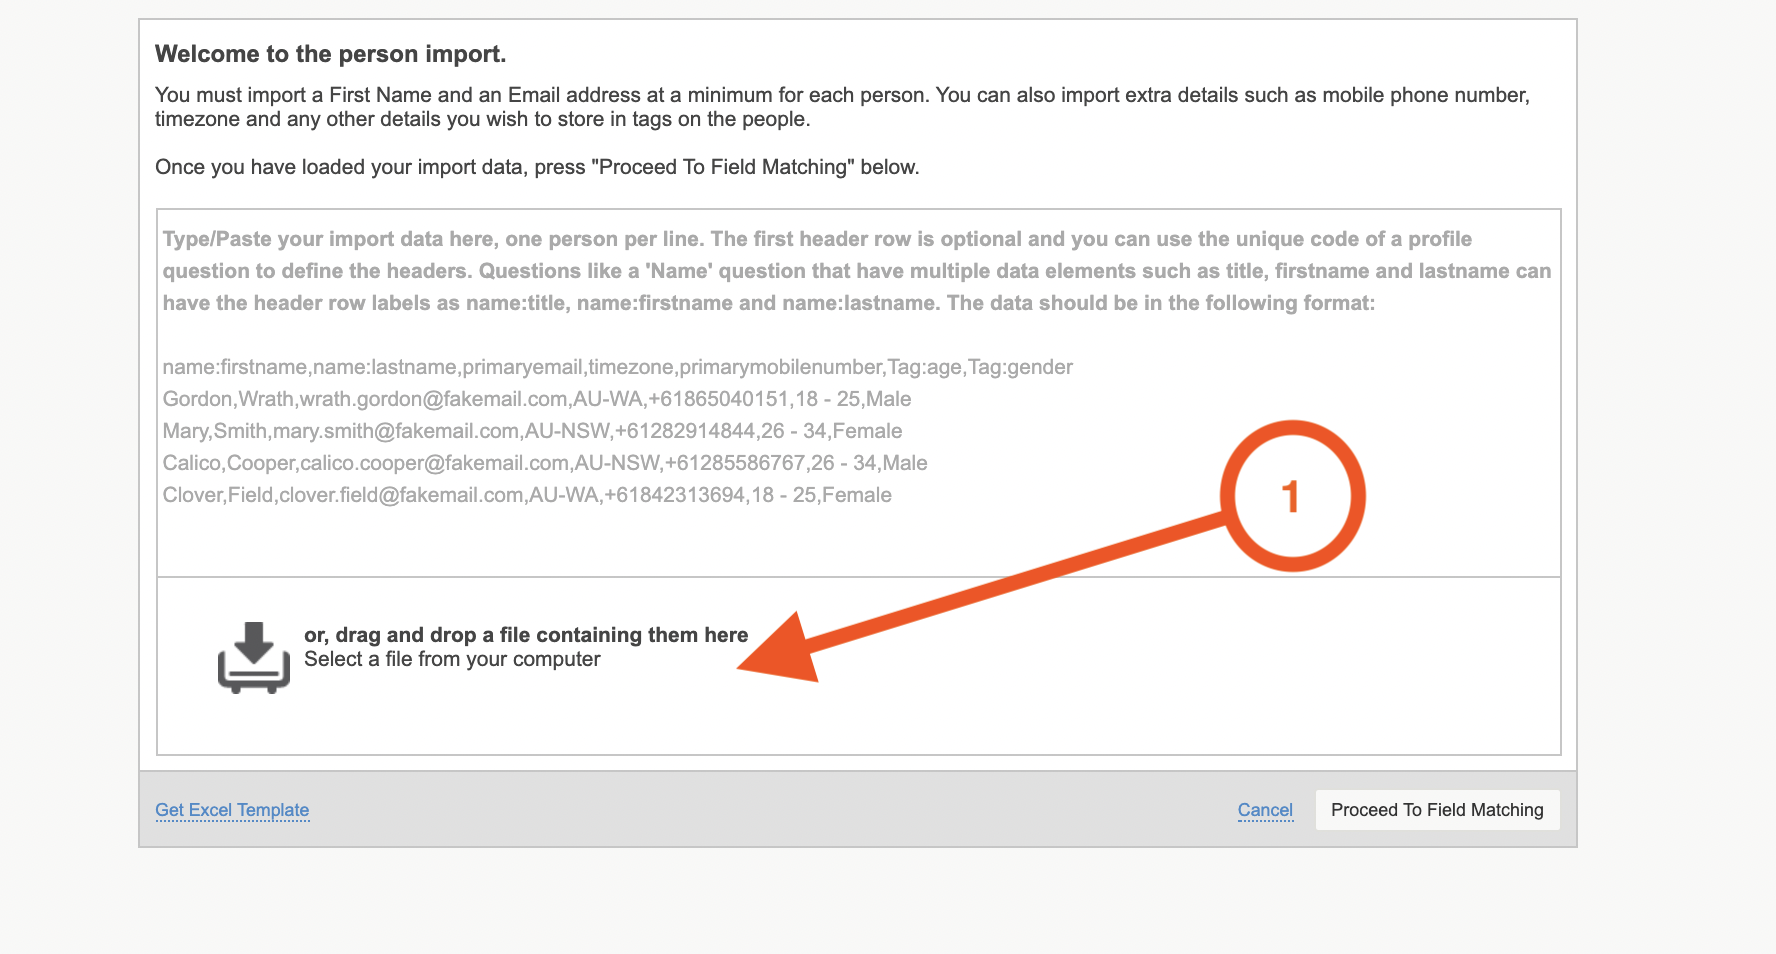
The most common way to add participants to a project is through an Excel spreadsheet. In order to efficiently and quickly import people, it is important to get a spreadsheet into a good format for importing. You can download our participant import template here
2. The platform will immediately work to convert the data in the file. The data will be visible in the text box, and you can confirm that you want to continue to field matching.
3. The data now must be matched with person fields , you can review the list of fields the platform has imported the data into to make sure they are correct.
TIP: The first three rows of data from your import are shown for each field to assist you in matching the data. To exclude data from the import, choose Exclude as the field type. If you want to link the data to another system, include the linking identifier by choosing External Person ID as the field type.
Tags can be used to add additional information about a person directly onto the person. Consider an example where we have the following data in our spreadsheet:
To track a person's city, we would choose the field type for the city column as either Tag (which would create the tags "Sydney" and "London") or Header:Tag (which includes the header as part of the tag, and would create the tags "City:Sydney" and "City:London"). If you would like to know more about person tags and how they work you can read our articles on them here:
- How do I manually add tags onto a person?
- What information can I add as a tag?
- How do I use tags to route participants to different activities?
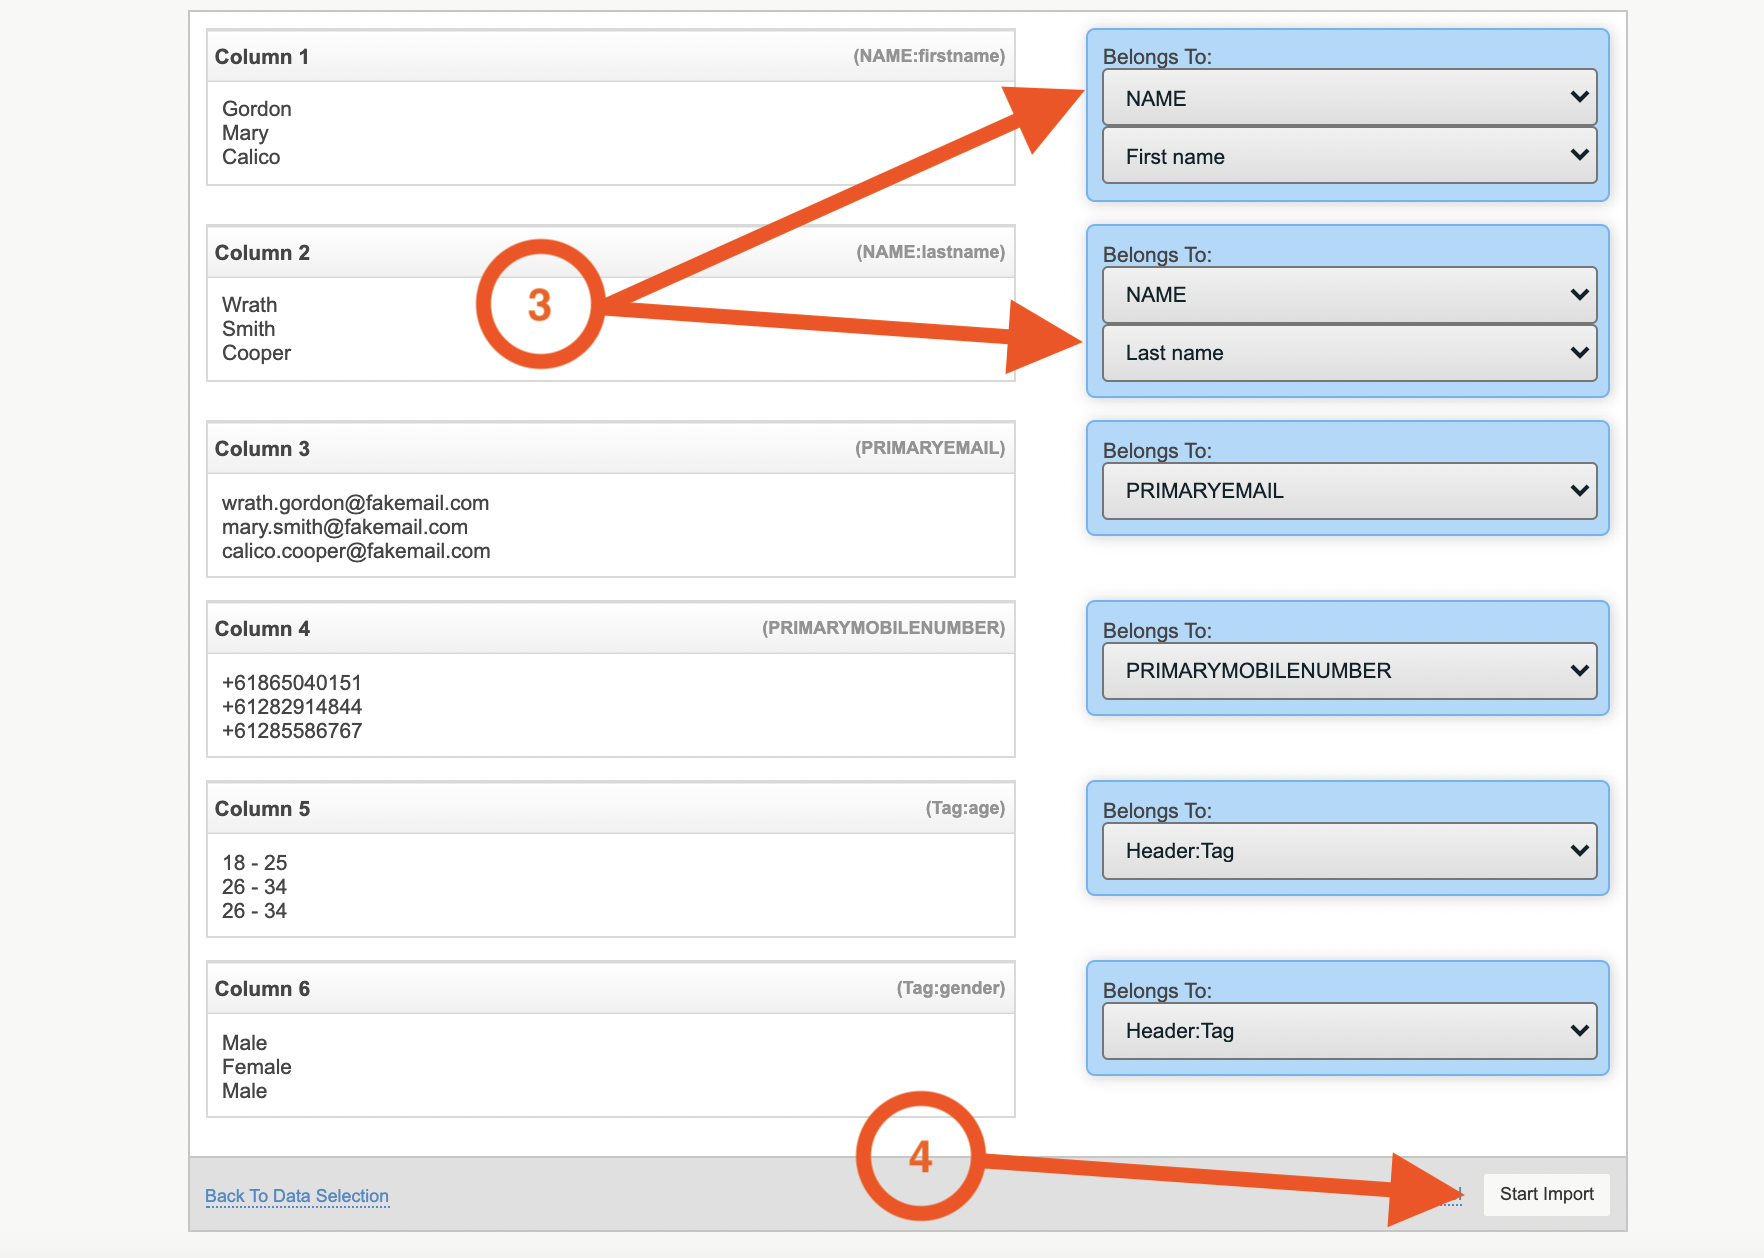
4. When you are happy, select start import, and then the importing process will begin.
5. If there are any issues, errors will be shown after the import process has been completed.
If you correct these errors i.e make sure the phone number and email are correct, it will save automatically and the import will be successful.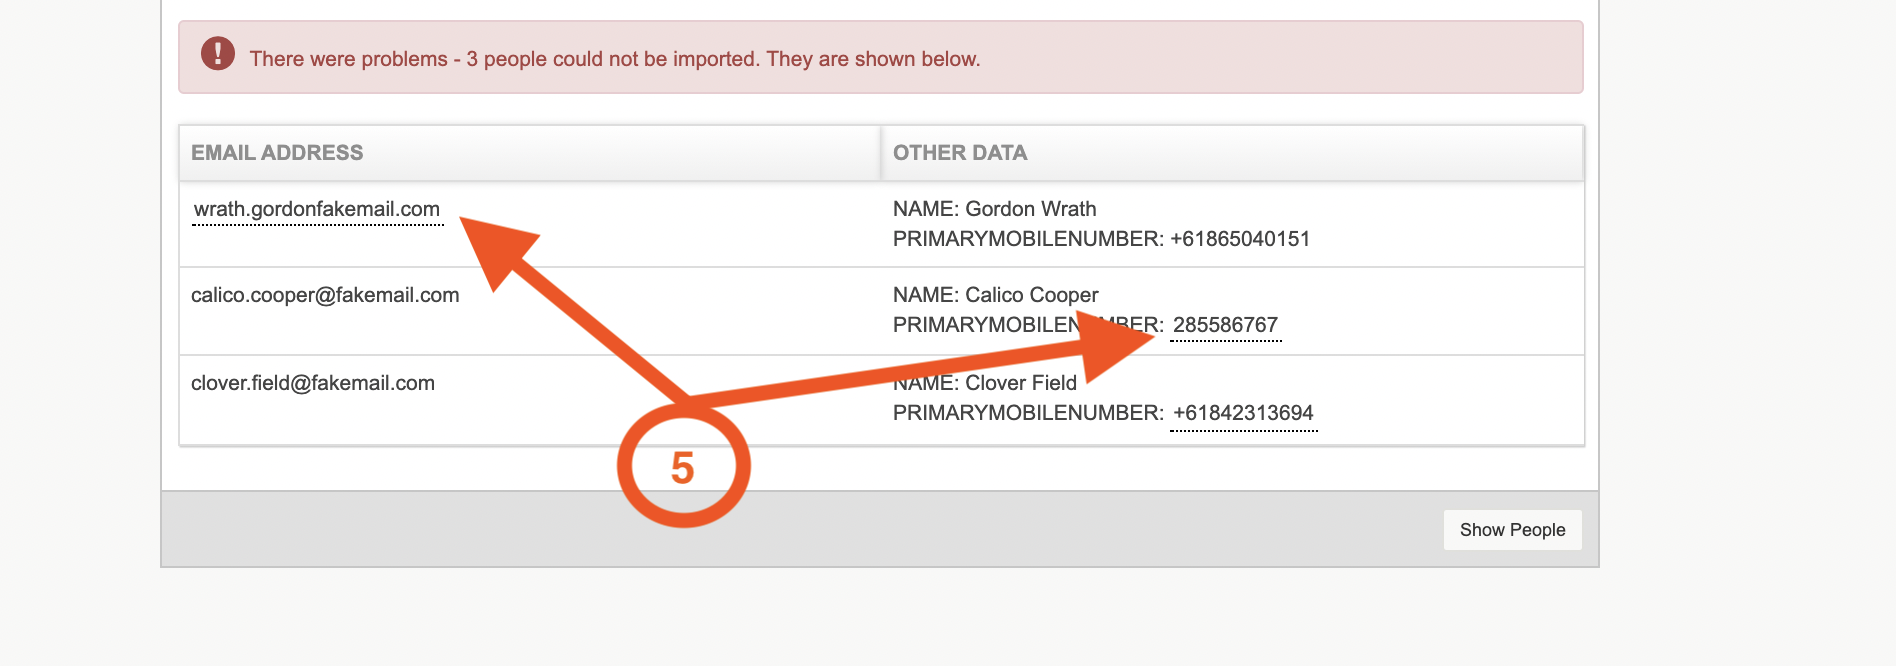
TIP: Any errors will be underlined so you can easily spot what needs to be corrected.
If you need any more assistance, or have any questions then please get in touch with our friendly support team who will gladly assist you. You can reach them at hello@qualzy.co.uk